Installation Instructions
All our plugins are designed to be easy to use and quick to set up by following the instructions in this document.
To install and set up the plugin, please follow the steps below.
In this article
Step 1: Download the premium plugin.
Please ensure you have downloaded the premium plugin and a license key.
If you want to download the premium plugin, click here to review the step-by-step guide. If you have already downloaded the plugin, go to step 2.
Step 2: Upload the premium plugin
There are two ways you can upload the plugin to your sites. Based on the accessibility, you can upload and install the plugin.
To upload the plugin, make sure you have downloaded the premium plugin and have the license key on hand. If you haven't downloaded the plugin yet, download it from this Download the Premium Version guide. There are two ways you can upload the plugin to your website to activate the license.
Step 2.1: Upload the plugin via the admin area
To set up the plugin via admin, go to your WordPress admin, then to Plugins → Add New → Upload Plugin. Click the ‘Choose file’ button, upload the plugin zip as you downloaded in the previous step, and click on the Install Now button to upload and install.

It may take a few seconds or minutes for you to see the ‘Plugin installed successfully’ message on this web page. So, patiently wait for the process to complete. Once the installation succeeds, click the ‘Activate Plugin’ button.

Step 2.2: Upload via FTP
Follow the steps below to upload the plugin using FTP software.
Extract the ZIP File: Unzip the downloaded file on your computer.
Access Your Site via FTP: Use an FTP client (like FileZilla) to connect to your website’s server. Navigate to the Plugins Folder: Go to /wp-content/plugins/ in your WordPress directory.
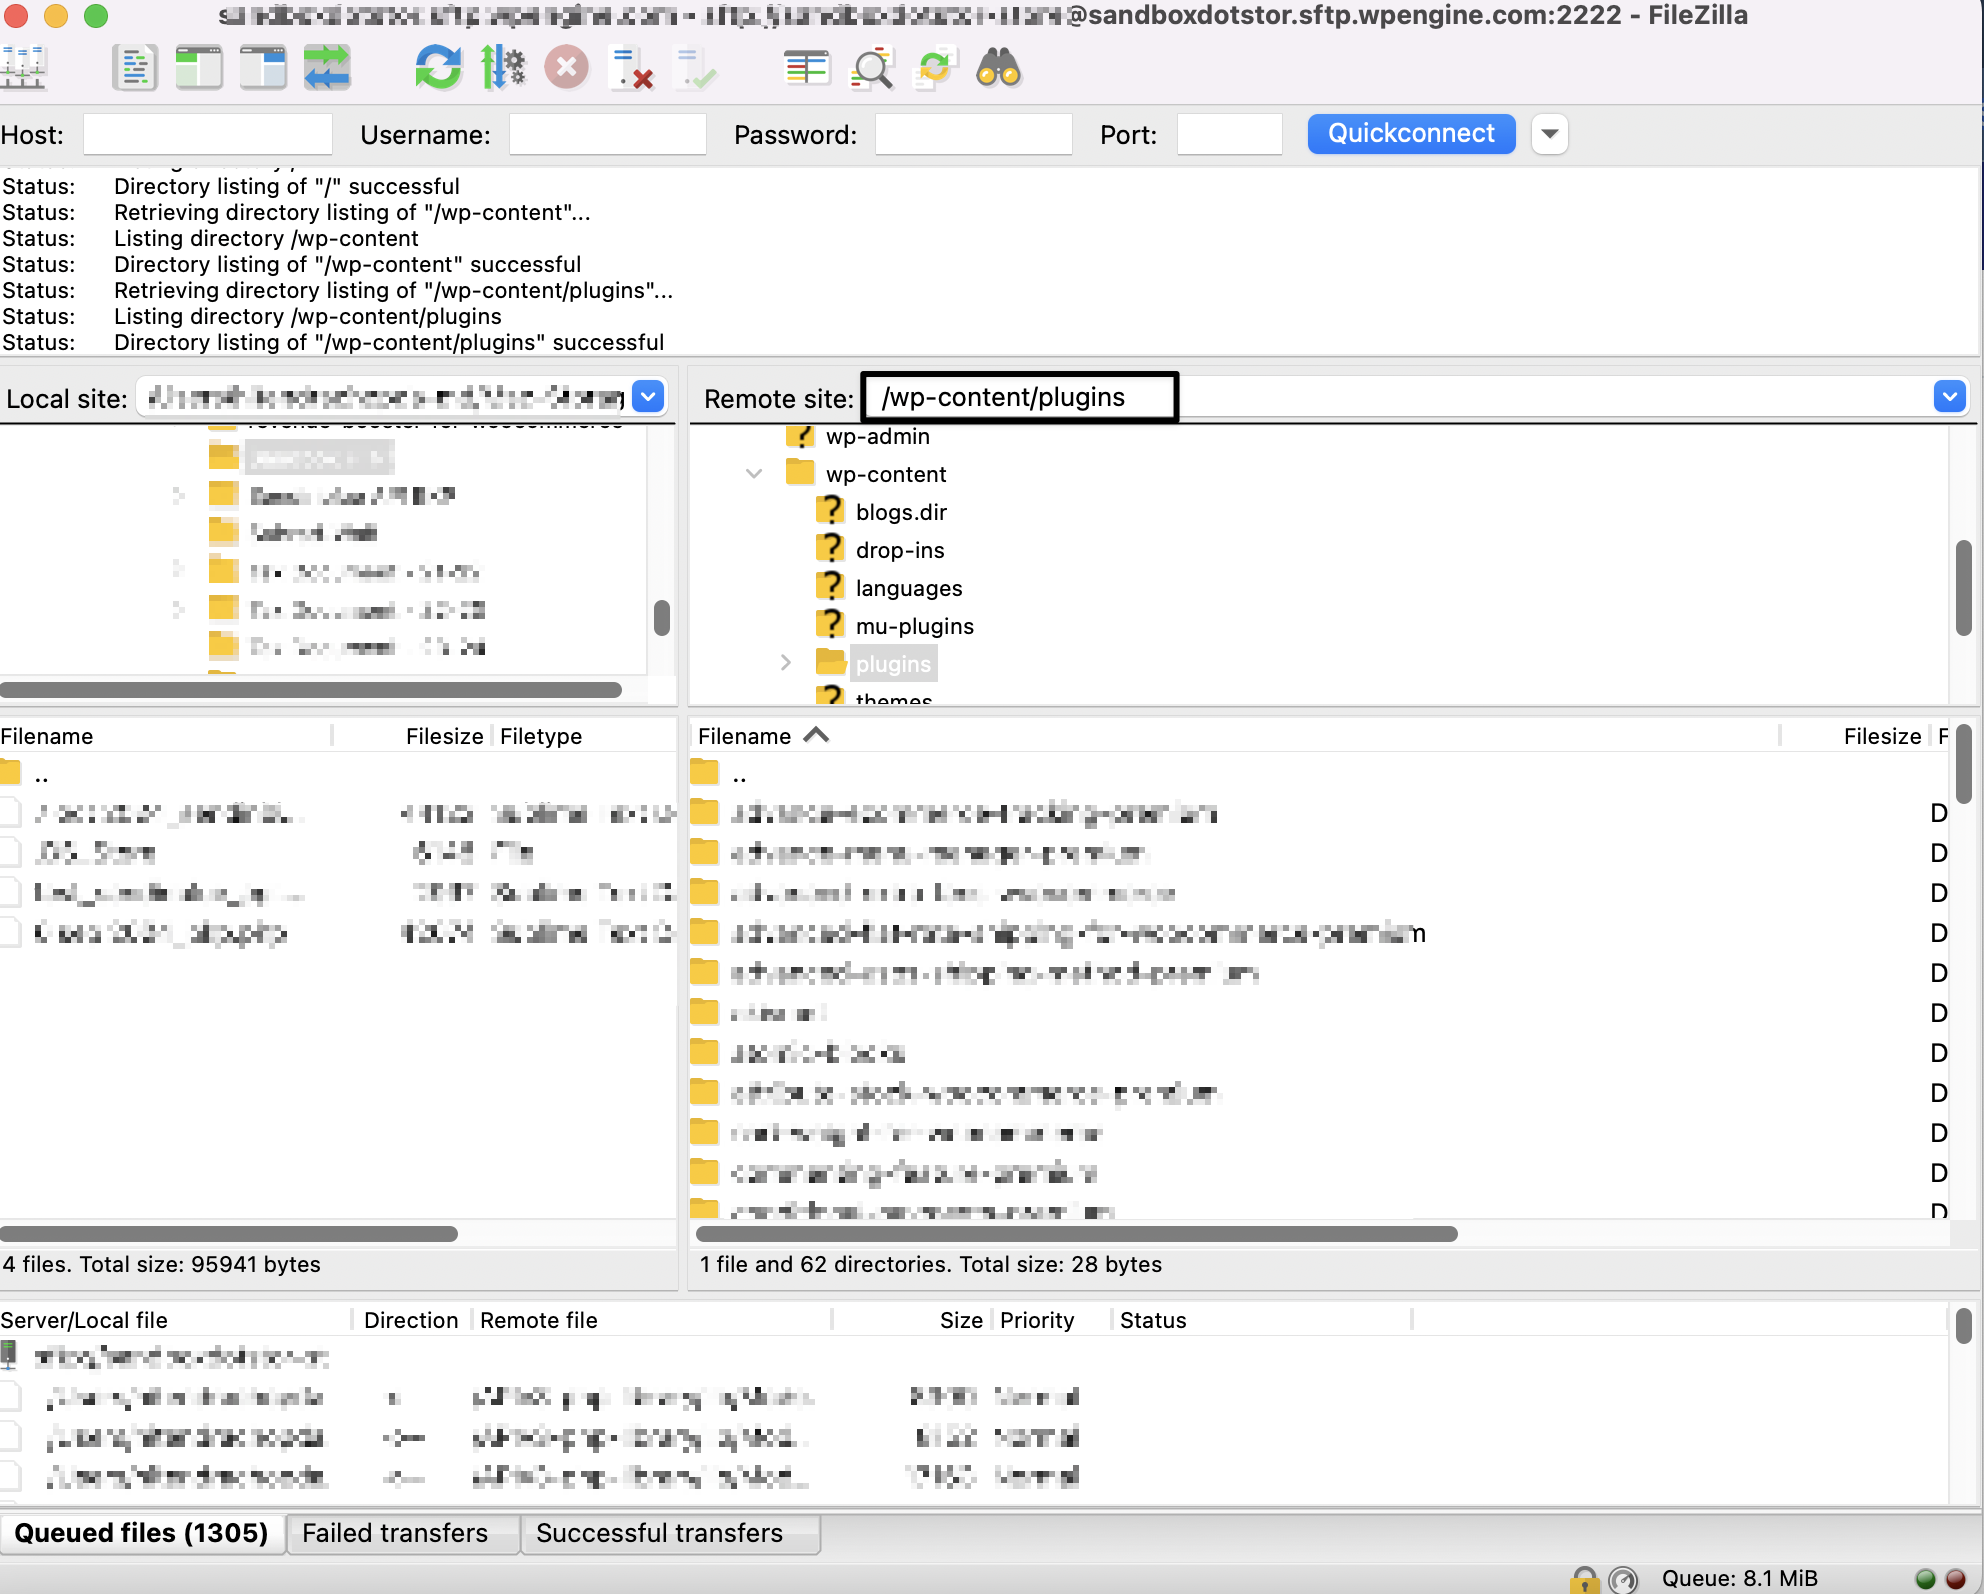
Upload the Plugin Folder: Upload the extracted plugin folder into the /plugins/ directory.
Step 2.3: Upload via cPanel
Click here and follow Step 3.2: Using the cPanel Method guide to upload the plugin via cPanel hosting.
Step 3: Activate the Plugin
Step 3.1 Activate on a single site
Log in to WordPress, go to Plugins > Installed Plugins, and activate the plugin. For details on activating your plugin license after installation, refer to the Activate License Guide.
Step 3.2 Activating Plugin on WordPress Multisite
- Go to Network Admin → Plugins
- Ensure the plugin is Network Activated.
- Navigate to the plugin settings from the Network Dashboard.
- Enter your license key in the plugin's License Settings section.
- Save and activate.

4. Does one license work across all Multisite subsites?
No. Each subsite or domain in a WordPress Multisite network is treated as a separate website for licensing purposes.
For example:
- If your license allows 1 site, it can be activated on one subsite only.
- If you have 3 subsites, you will need a license that supports 3 sites.
- If your Multisite network uses different domains (domain mapping), each domain also counts as a separate site.
To activate the plugin across multiple subsites, make sure your license includes enough site activations for the number of subsites where the plugin will be used.
If you are unsure how many activations your license includes, please contact our support team and we'll be happy to help verify your license details.