How to create a new min/max quantity rule
Easily create flexible min/max quantity rules for your WooCommerce store, allowing you to control customer purchases based on various conditions like product categories, stock levels, and more.
Step-by-Step Guide:
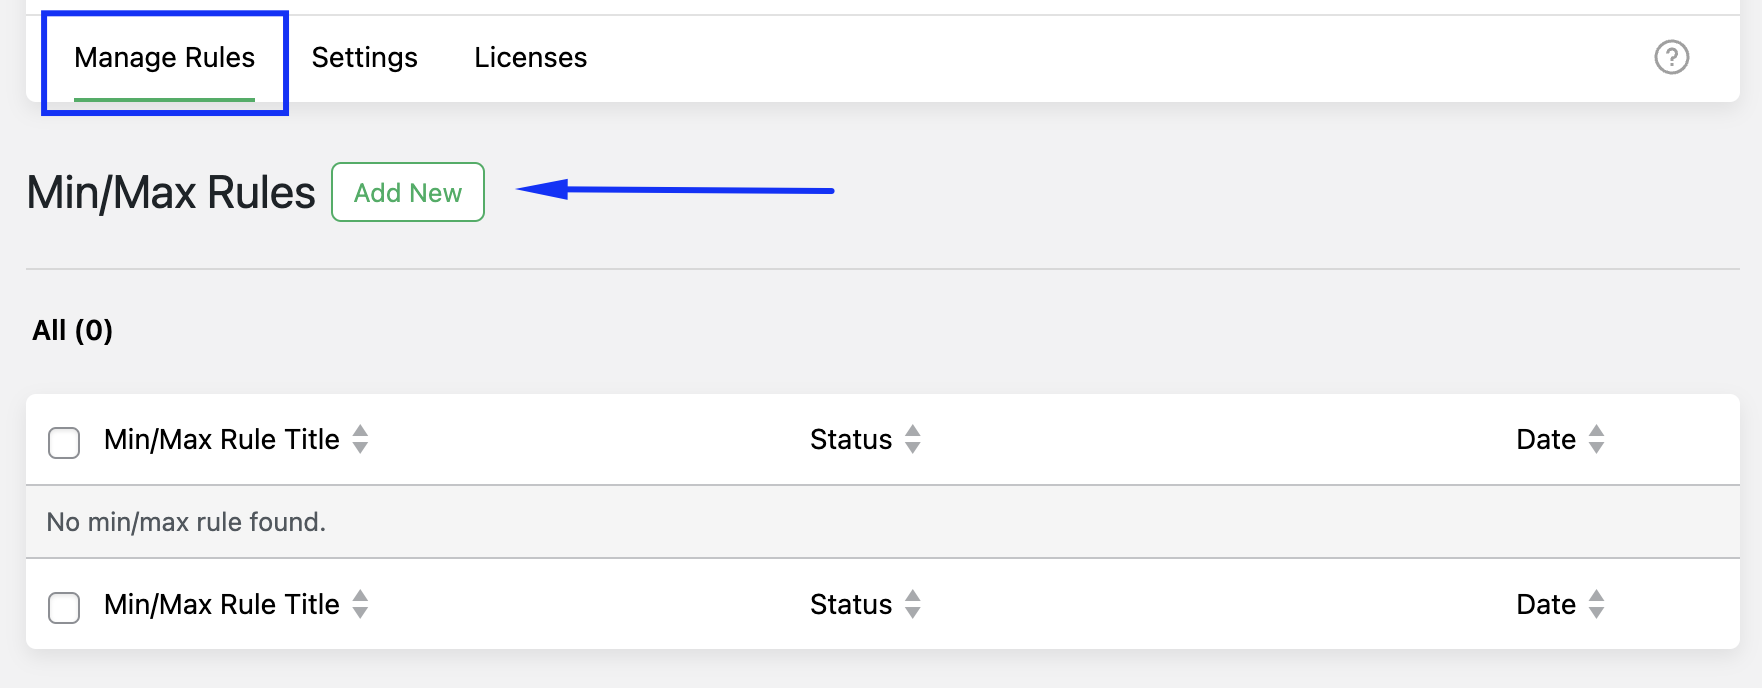
Step 1: Go to the "Manage Rules" page in the plugin settings and click the "Add New" button to create a new rule.
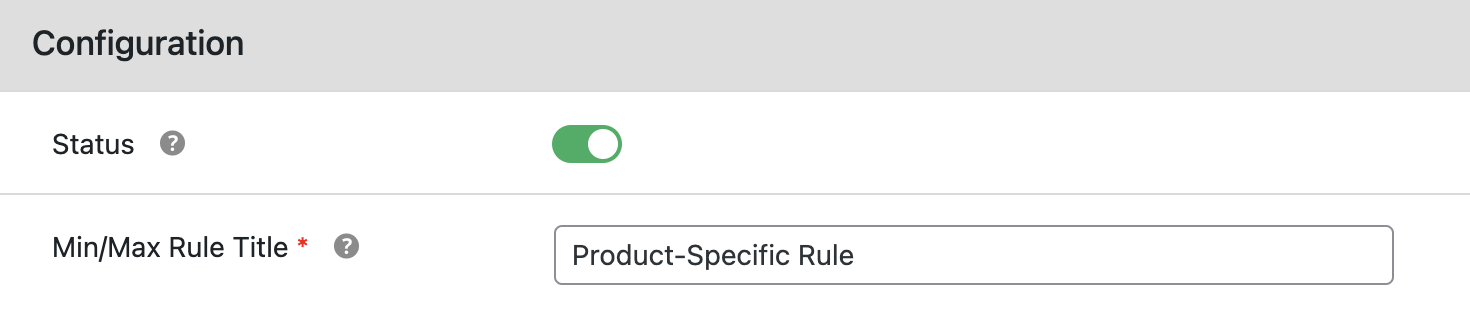
Step 2: Under the "Configuration" section, set the rule's status (Active/Inactive) and assign a descriptive name to the rule, such as "Product-Specific Rule" or "Category-Specific Rule," so you can easily identify it later.
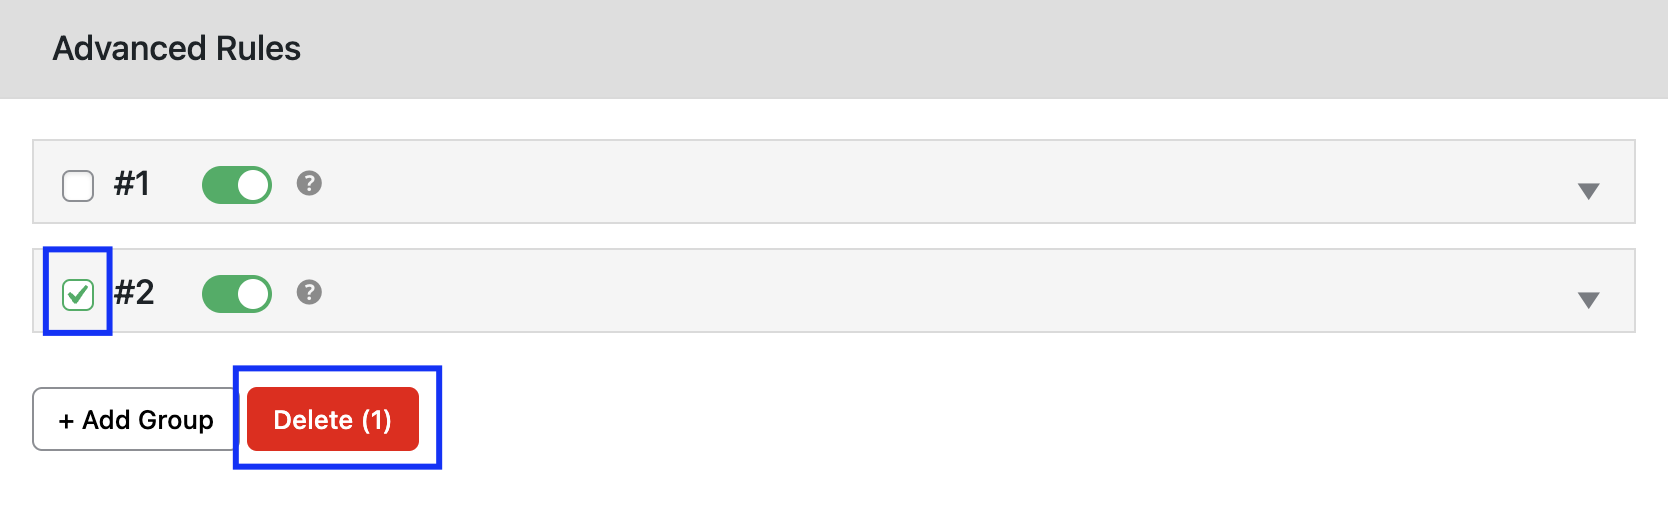
Step 3: In the "Advanced Rules" section, you will find a group where you can configure min/max quantity rules based on different conditions like product-specific, category-specific, or more. To create multiple groups, click the "+ Add Group" button.
Note: Each group has a status option. If this status is disabled, the rules in that group will not be applied to the front end.

To delete any group, select the group and click the "Delete" button.
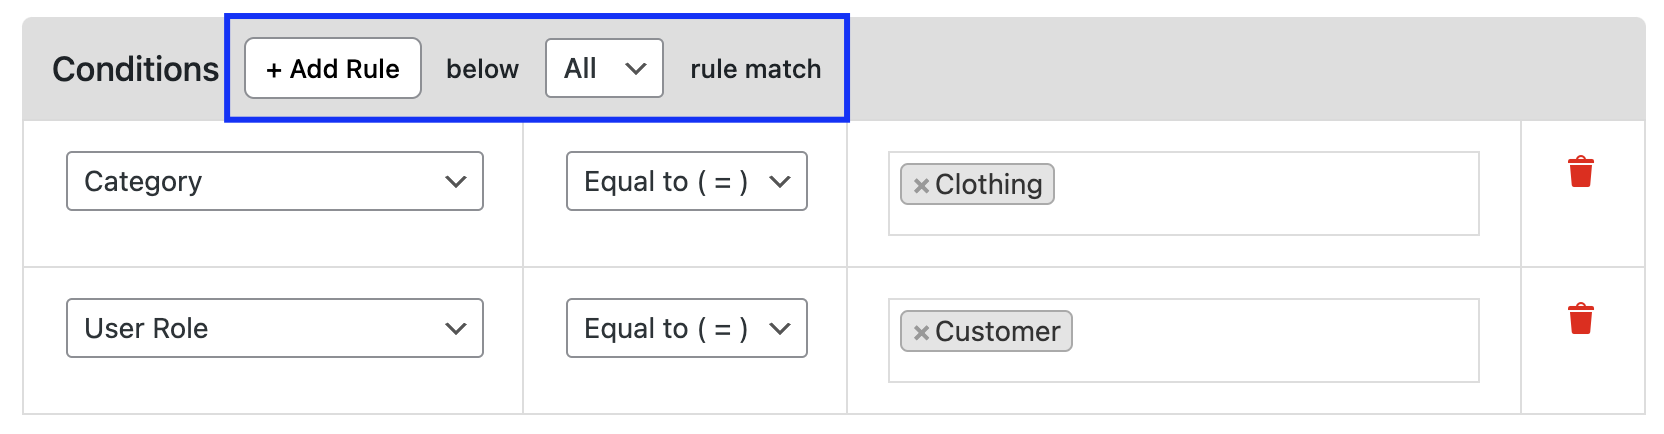
Step 4: In the "Advanced Rules > Conditions" section, configure the conditions based on your store's needs. For example, you can set a minimum quantity for specific product categories by selecting the category-specific condition and choosing the relevant categories.

Step 5: To add multiple conditions, click the "+ Add Rule" button. This allows you to create complex rules by combining various conditions. For instance, you could set a minimum quantity for a specific product category and apply it only to customers from specific user roles.
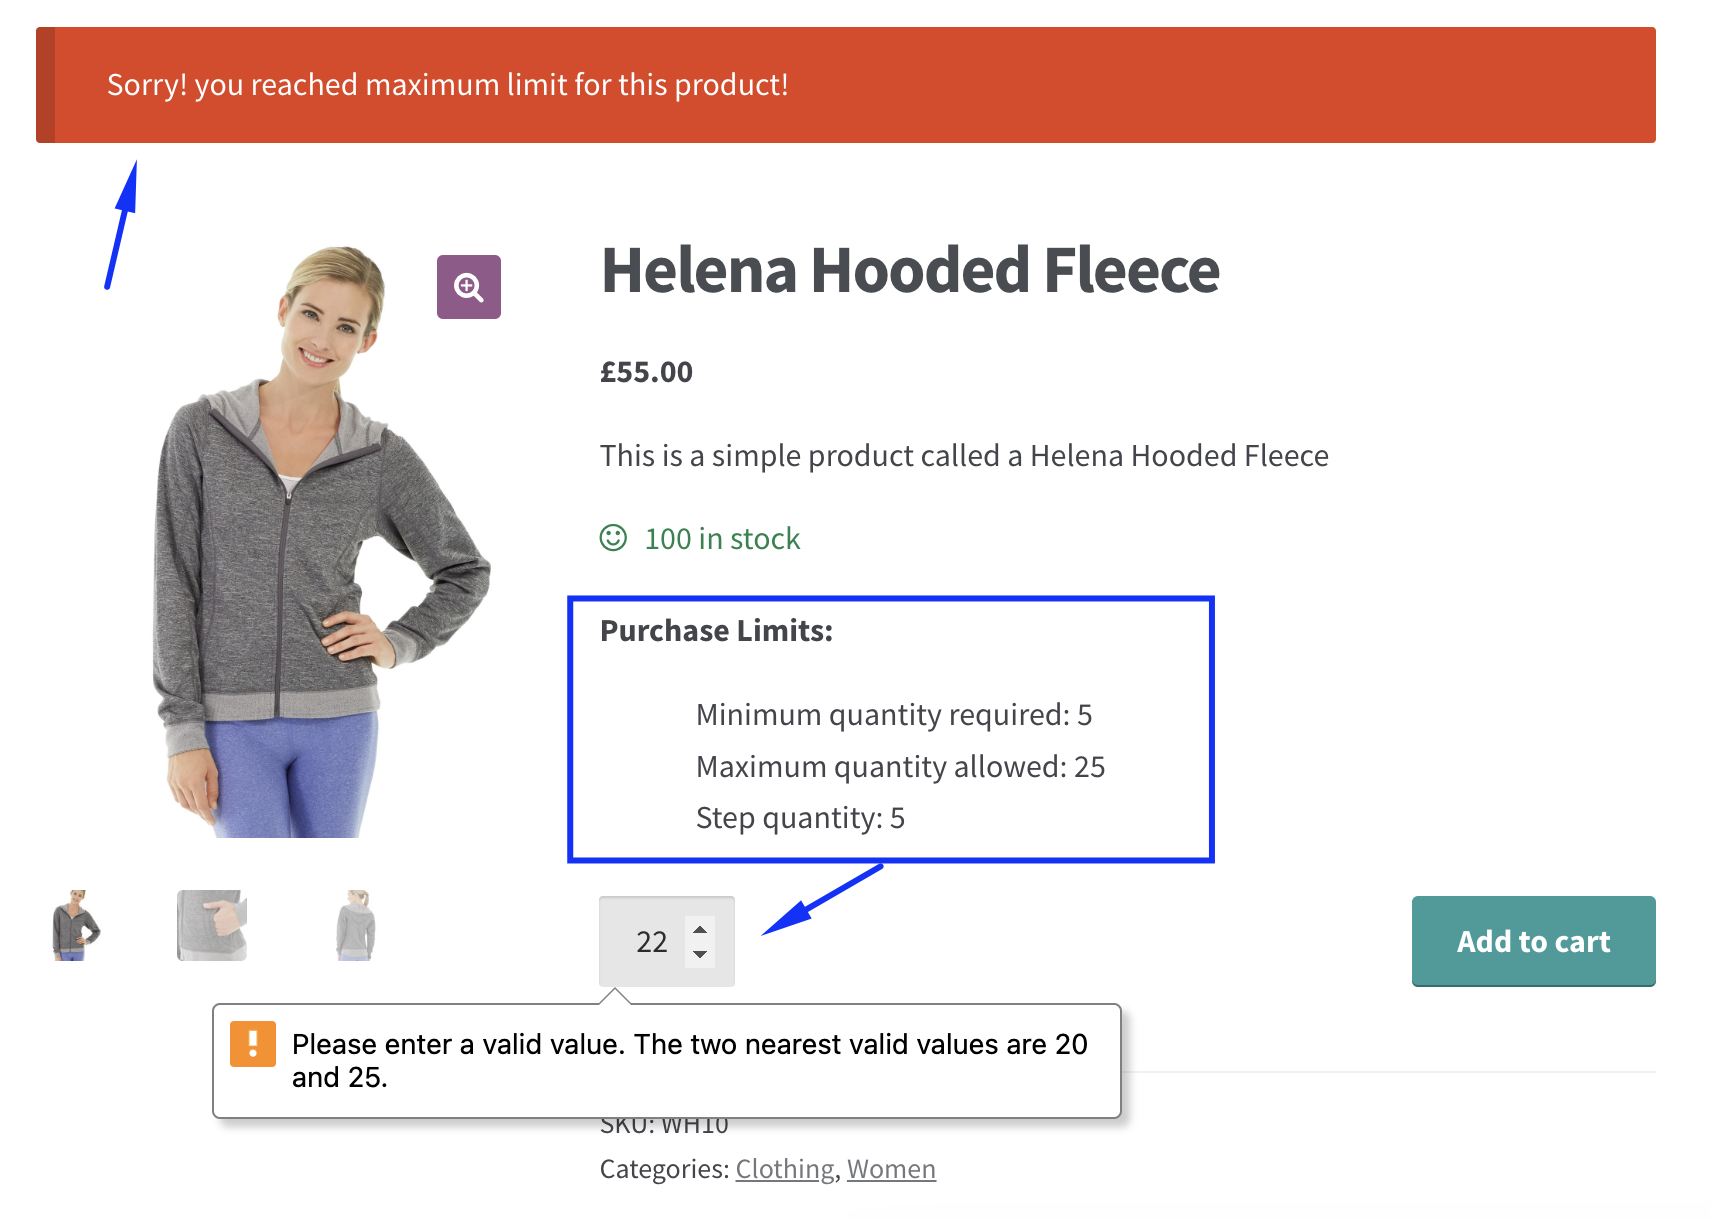
Step 6: In the "Advanced Rules > Action" section, define the minimum and maximum quantity limits for the rule. You can also configure the default input value, step quantity, and input selector (dropdown, radio buttons, etc.) to customize how customers input their desired quantities.