How to display applied min/max rules on product and cart pages
Displaying applicable minimum and maximum quantity rules on your product and cart pages helps customers clearly understand purchase limits before checkout.
By showing these rules at the right time and in the right format, you can reduce confusion, prevent cart errors, and improve the overall buying experience.
This feature allows you to:
- Show rules on product and cart pages
- Control where rules appear on the product page
- Choose how rules are displayed (Table or Notification style)
Why Display Min/Max Rules to Customers
- Improves transparency during shopping
- Reduces cart validation errors
- Helps customers comply with quantity requirements
- Prevents surprise messages at checkout
- Improves overall user experience
Where Can Rules Be Displayed?
You can display min/max quantity rules on:
- Product pages
-
Cart page

Front: Display Rules on Cart Page - Or both

These settings are managed from the Display Rules section in the plugin.
How to Configure Display Rules (Admin Settings)
Step 1: Open Display Rules Settings
- Go to WordPress Dashboard → Dotstore Plugins → Min/Max Quantity
- Open the Settings tab
- Navigate to the Display Rules section

Step 2: Enable Rule Display Locations
In the Display Rules settings:
- Enable Show rules on cart page to display rules on the cart page
- Enable Show rules on product page to display rules on single product pages
These options ensure customers see applicable rules before checkout.
Step 3: Choose Rule Position on Product Page
When displaying rules on the product page, select where they should appear:
- Before Add to Cart
- After Add to Cart
Choose the position that best fits your store layout and customer flow.
Step 4: Add Text Before Rules (Optional)
In the Text before rules field, you can add a heading or short message, such as:
- “Quantity Requirements”
- “Purchase Limits”
- “Please note the following rules:”
This helps customers understand the context of the displayed rules.

Rule Display Type
You can now choose how min/max rules are displayed on product pages using the Rule display type option.
Available Display Types
1. Table (Default)
- Displays rules in a structured table format
- Best for stores with multiple or complex rules
- Easy to scan and compare limits
Best for:
Wholesale stores, bulk rules, detailed quantity conditions
2. Notification (New)
- Displays rules as a WooCommerce-style notice
- Matches WooCommerce’s native success/error messages
- More compact and visually noticeable
Best for:
Simple rules, clean product pages, minimal UI
This option is especially useful if you want rules to feel like part of WooCommerce’s default experience.
How to Change Rule Display Type
- Go to Min/Max Quantity → Settings → Display Rules
-
Locate Rule display type
Select:
-
Table, or

Front: Display Rules on Product Page in Table Format -
Notification
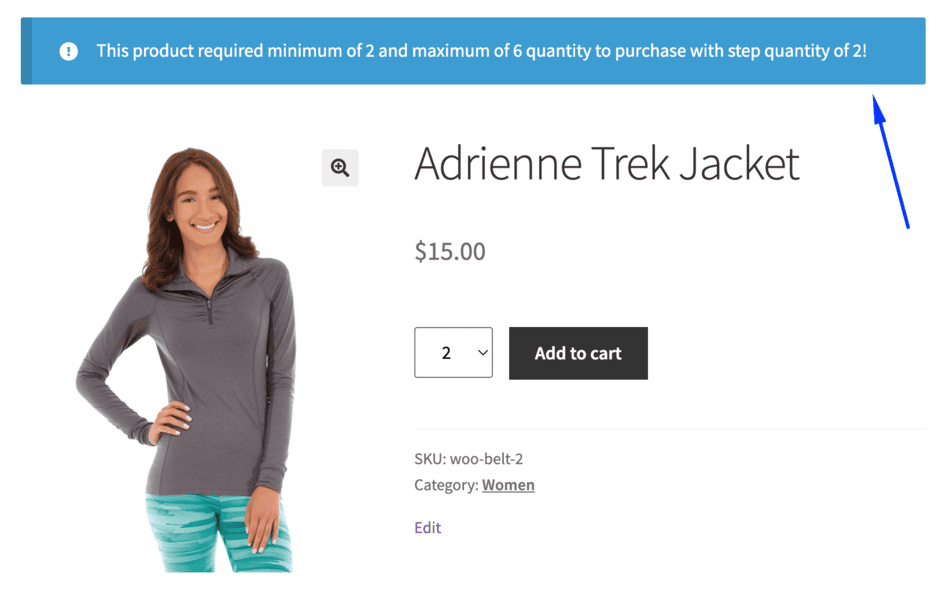
Front: Display Rules on Product Page in Notification Format
-
- Click Save changes


The selected format will apply immediately to the product page.
Example Use Cases
1. Bulk Purchase Products
A store selling items in bulk can display rules in table format to clearly show minimum, maximum, and step quantities.
2. Simple Purchase Limits
A store with a simple “Minimum 5 items required” rule can use the notification display for a cleaner product page.
3. Wholesale Cart Rules
Wholesale stores can display cart-level quantity rules on the cart page so buyers know they must meet minimum requirements before checkout.
FAQs
1. Can I show rules on both product and cart pages?
Yes. You can enable rule display on both product and cart pages at the same time.
2. Does the rule display type affect the cart page display?
No. The display type option primarily affects how rules appear on the product page.
3. Can I switch between Table and Notification later?
Yes. You can change the rule display type anytime from the Display Rules settings.
4. Will this work with all themes?
Yes. The Notification style follows WooCommerce’s default notice system and works well with block-based and classic themes.