How to add a fixed fee to Shopify checkout (step-by-step guide)
Sometimes, you may want to charge your customers a small fixed amount for services like order processing, gift wrapping, or packaging costs.
With the Extra Fees Manager app for Shopify, you can easily add such custom fees — no coding required.
This guide will walk you through creating a fixed extra fee in just a few simple steps.
In The Article
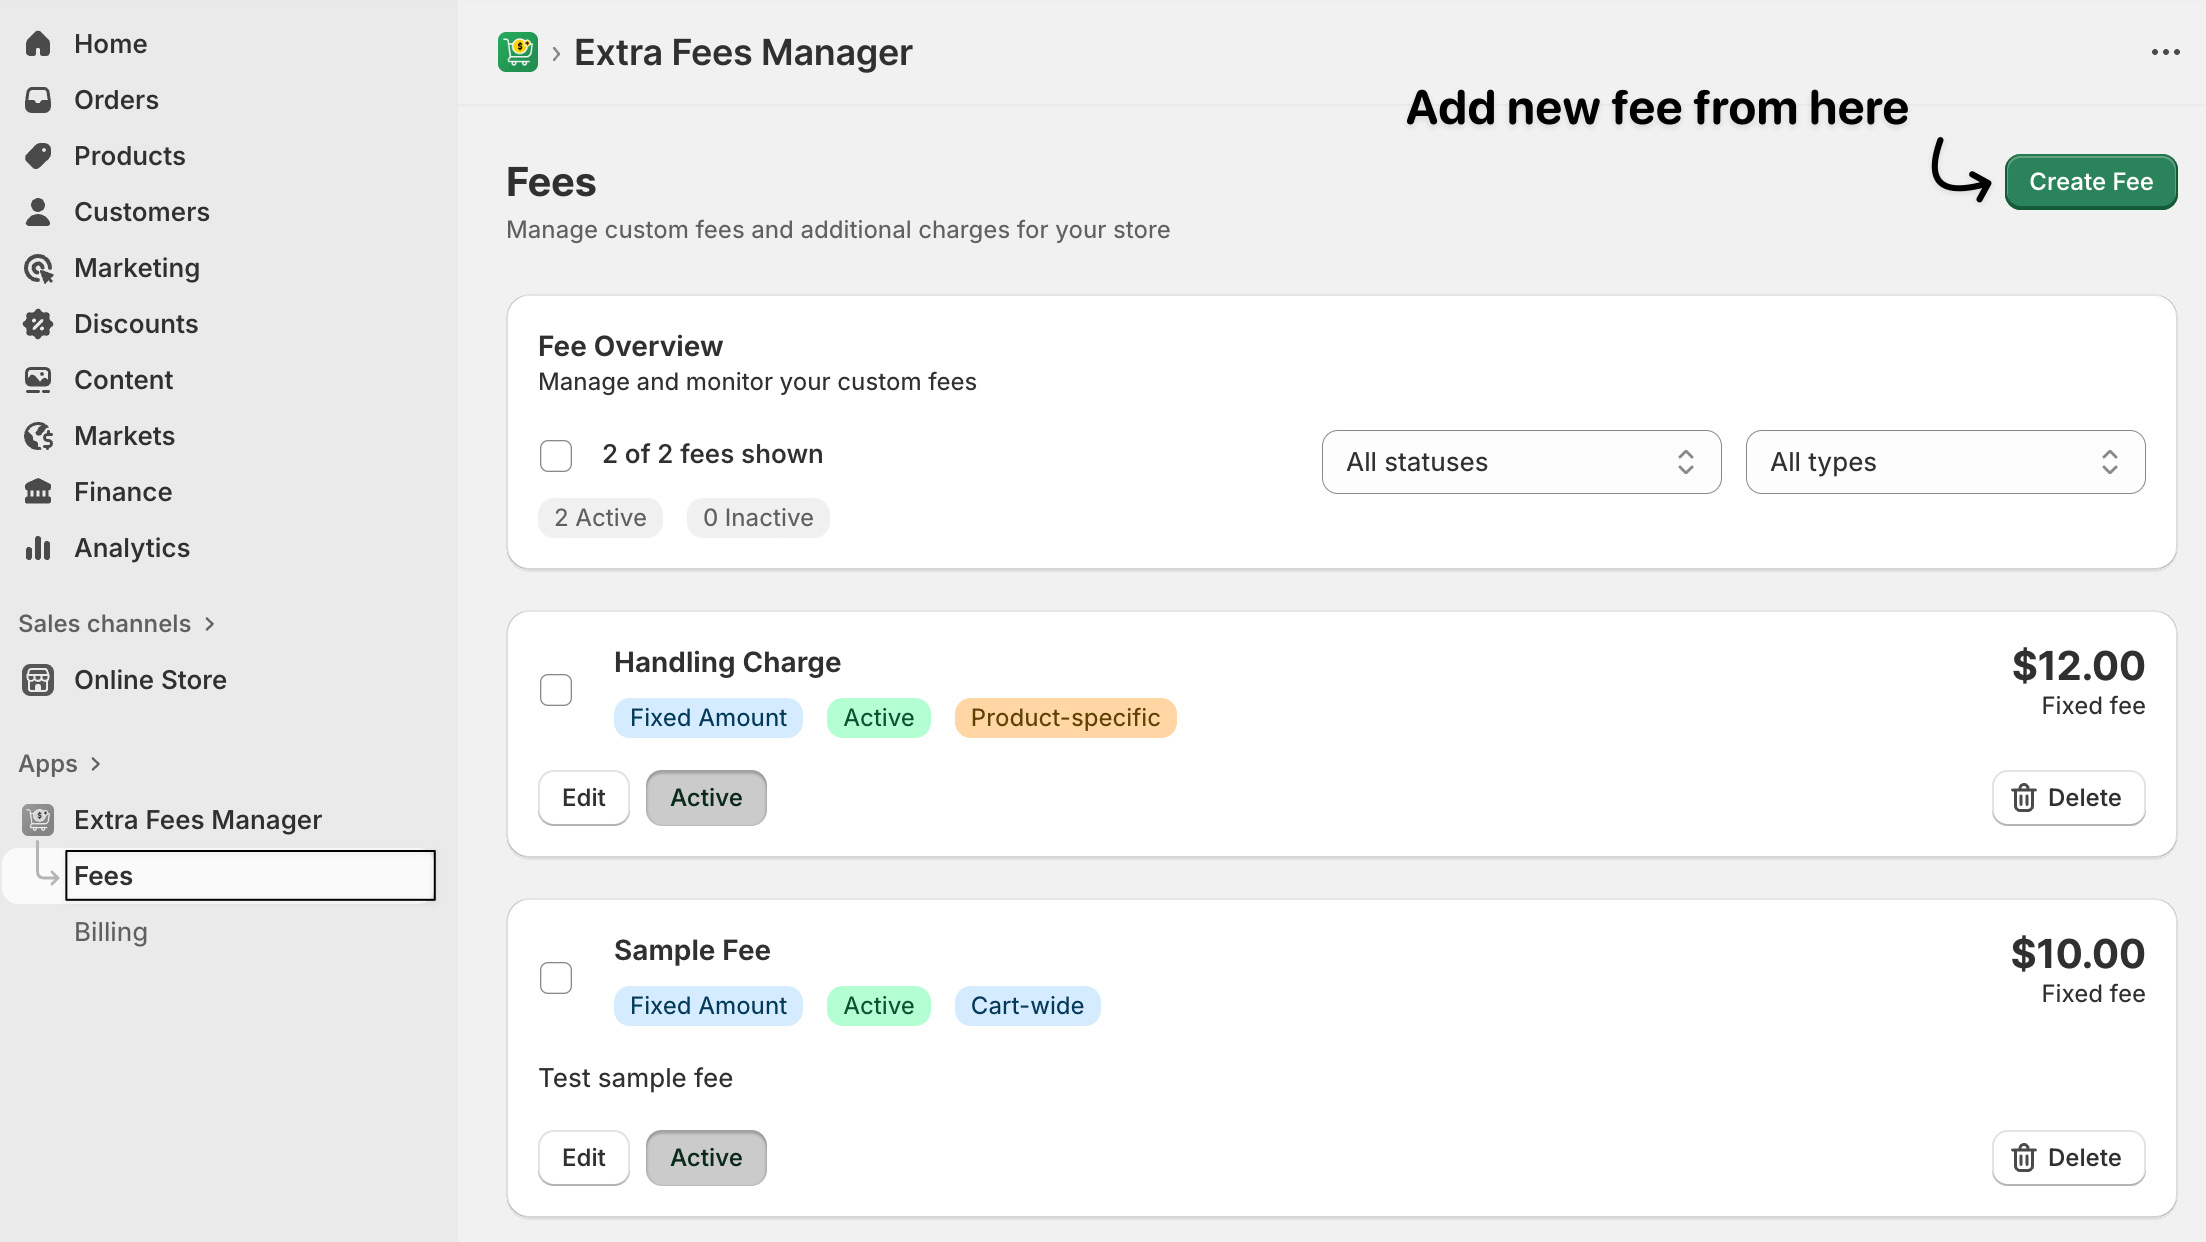
Step 1: Open the Extra Fees Manager App
- From your Shopify admin, go to Apps → Extra Fees Manager.
- On the dashboard, click Create Fee to start adding a new fee.
You’ll now see a setup screen divided into several sections, like Fee Details, Fee Configuration, and Schedule Activation.
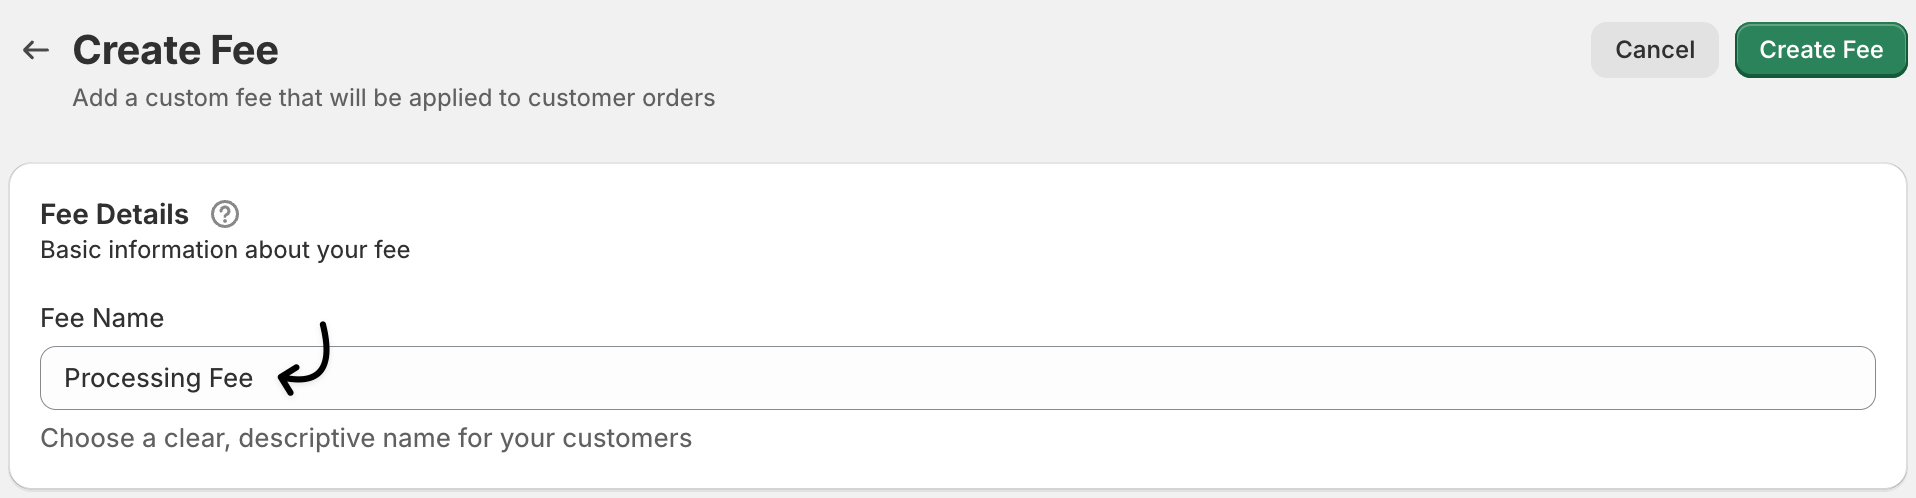
Step 2: Add Fee Details
Under the Fee Details section:
-
Fee Name: Enter a descriptive name for your fee, such as Processing Fee or Gift Wrap Fee.
Tip: Customers will see this name at checkout, so keep it clear and short.
-
Description (Optional): Add a short note explaining what the fee covers, e.g., “Covers packaging and handling costs.”
This description helps maintain transparency and builds trust.
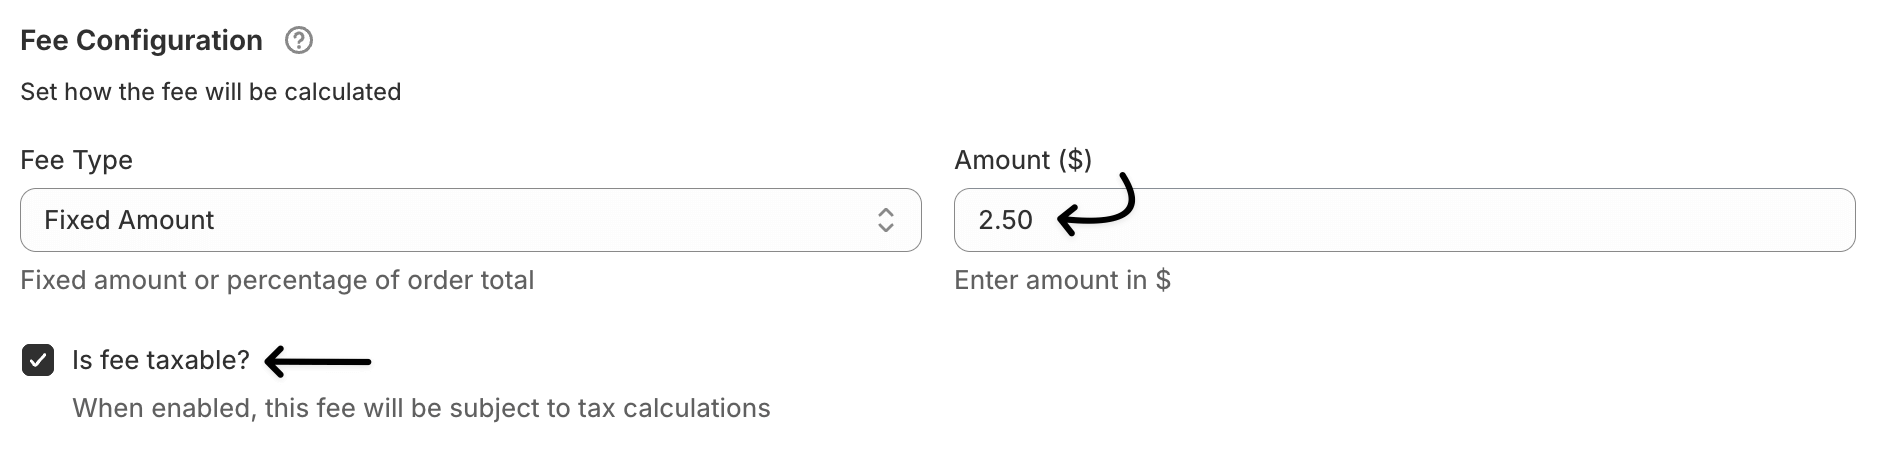
Step 3: Configure the Fee Type
Under Fee Configuration:
-
Fee Type: Select Fixed Amount.
This ensures that the same fee is applied to every order, regardless of the cart total.
-
Amount ($): Enter the fixed value you want to charge.
Example:
2.50means a $2.50 flat fee will be added per order. - Is Fee Taxable?: Turn this on if you want the fee to be included in your store’s tax calculations.
Step 4: Choose Where the Fee Applies
Go to the Applies To section:
-
Cart Specific: Choose this option if the fee should apply to the entire cart.
(If you want to charge fees for specific products or categories instead, you can configure that separately.)

Step 5: (Optional) Add an Image
In the Fee Image (Optional) section, you can upload a small image to display beside the fee on checkout.
For example, if you’re adding a gift wrap fee, upload an image of a wrapped gift box for visual clarity.

Step 6: Save Your Fee
Once you’ve entered all the details, click Save Fee at the bottom.
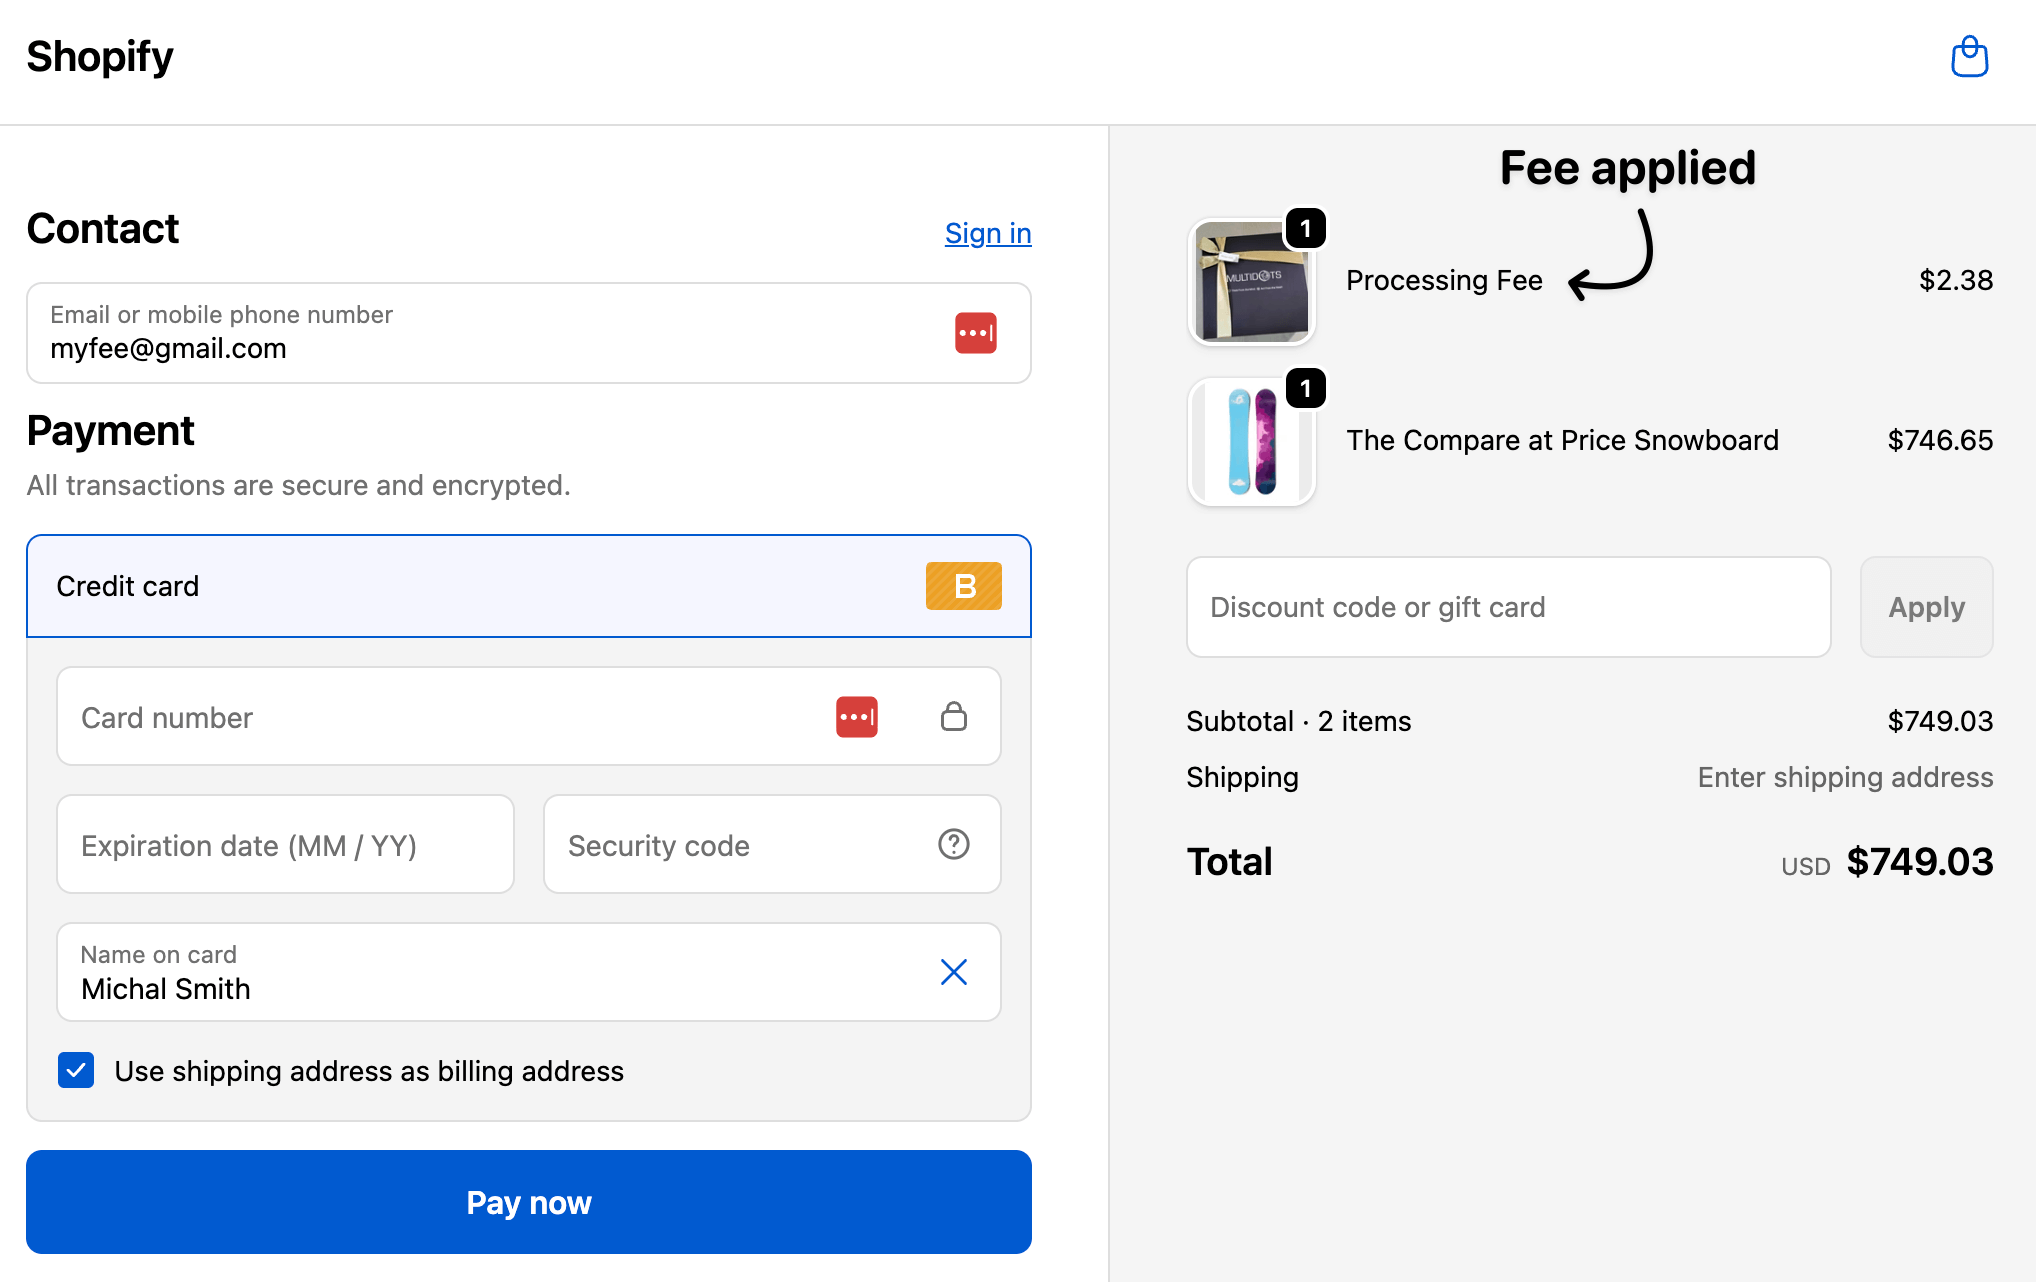
Your fixed extra fee is now live and will automatically appear in the cart and checkout pages when customers place orders.
Pro Tip: Schedule Fees for Seasonal Periods
Want to activate the fee only during certain dates (like holidays or weekends)?
Use the Schedule Activation section to set start and end dates.
This helps automate temporary fees like Holiday Gift Wrap Fees or Weekend Service Charges.
Example Setup
| Setting | Example Value |
|---|---|
| Fee Name | Order Processing Fee |
| Fee Type | Fixed Amount |
| Amount ($) | 2.50 |
| Is Fee Taxable | Yes |
| Applies To | Entire Cart |
Final Outcome
Once configured, customers will see your fixed fee clearly itemized at checkout:
Order Summary
Subtotal: $45.00
Processing Fee: $2.50
Total: $47.50
This keeps your pricing transparent and ensures you recover additional costs seamlessly.