Getting Started with Revenue Booster Plugin
Welcome to Revenue Booster for WooCommerce!
This plugin is designed to help shoppers create multiple offers for customers in order to boost sales. Store owners can create several discounted offers for customers on product & checkout pages to enhance their shopping experience.
These offers can include frequently bought-together items, order bump options, and cross-sells at checkout pages.
If you haven't already installed the Revenue Booster For WooCommerce plugin, please refer to the installation instructions.
In This Article
Step - 1 Getting Started with Install & Activate the Plugin
After downloading the plugin, follow the below instructions to install & activate the plugin.
- Login to your WordPress website dashboard.
- Navigate to Plugins > Add New.
- Click the Upload Plugin button at the top of the screen.
- Upload the revenue-booster-woocommerce.zip file you’ve downloaded.
- Install and Activate the plugin.
After installing & activating the Revenue Booster For WooCommerce plugin, you can see Global Settings, Order Bumps, and After Checkout setting menu in the top menu list.
Step - 2 Configure the Frequently Bought Together Settings
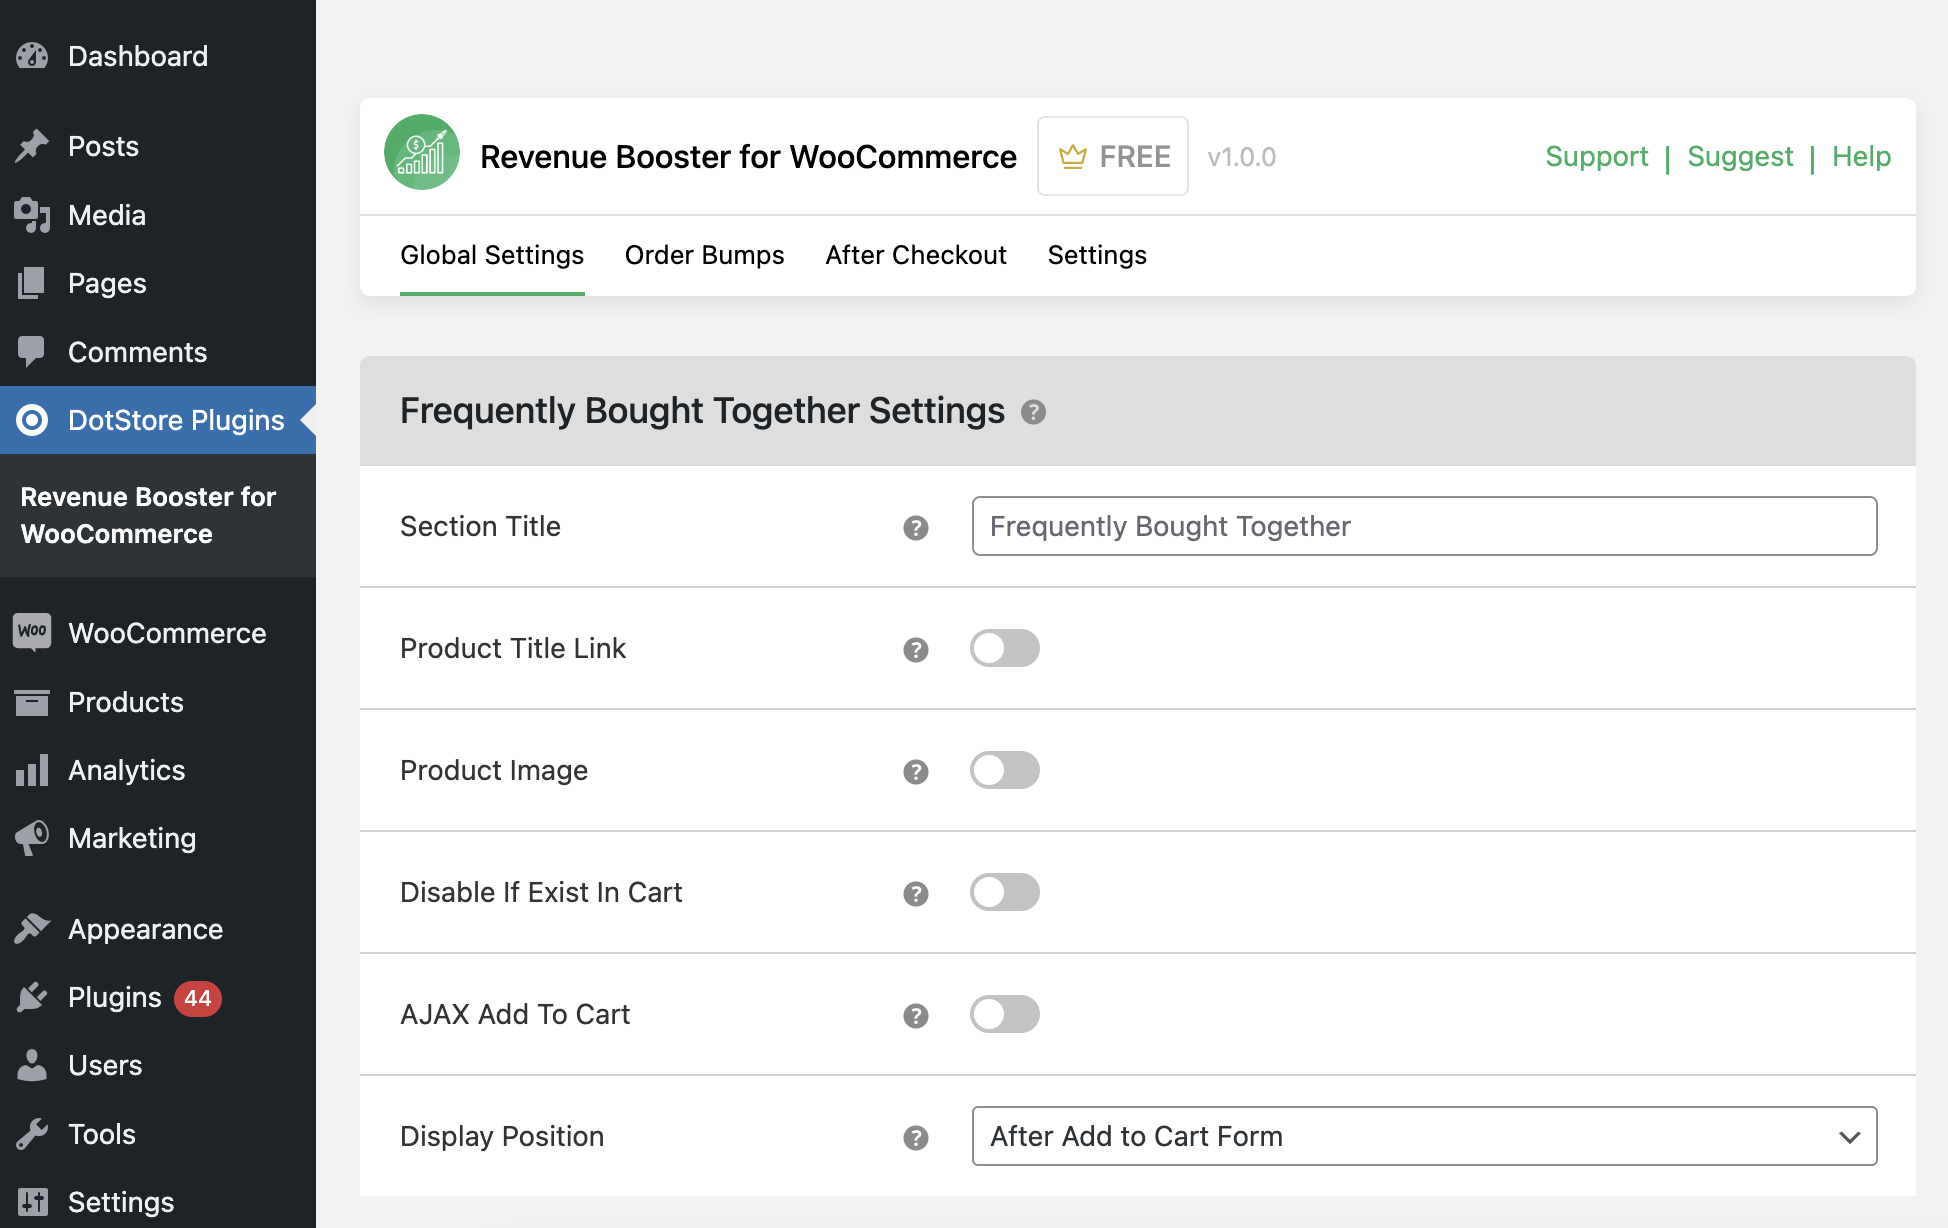
In the above screenshot, you can observe the various settings that need to be configured according to your requirements.
Within the Frequently Bought Together Settings section, you will find the settings related to the section title, product title, product image, add-to-cart type, and display position, among others.
The Benefits of Frequently Bought Together Offer
This plugin lets you assign multiple special offers to a single product, with no limitations on recommendations.
You can experiment with different bundles, target various audiences, and use both cross-selling and up-selling strategies to maximize profits.
Create offers with any number of products—two, three, or more. Plus, you can make bulk suggestions for every product in a category, offering a universal starting point that can be refined as you learn more about your customers' needs.
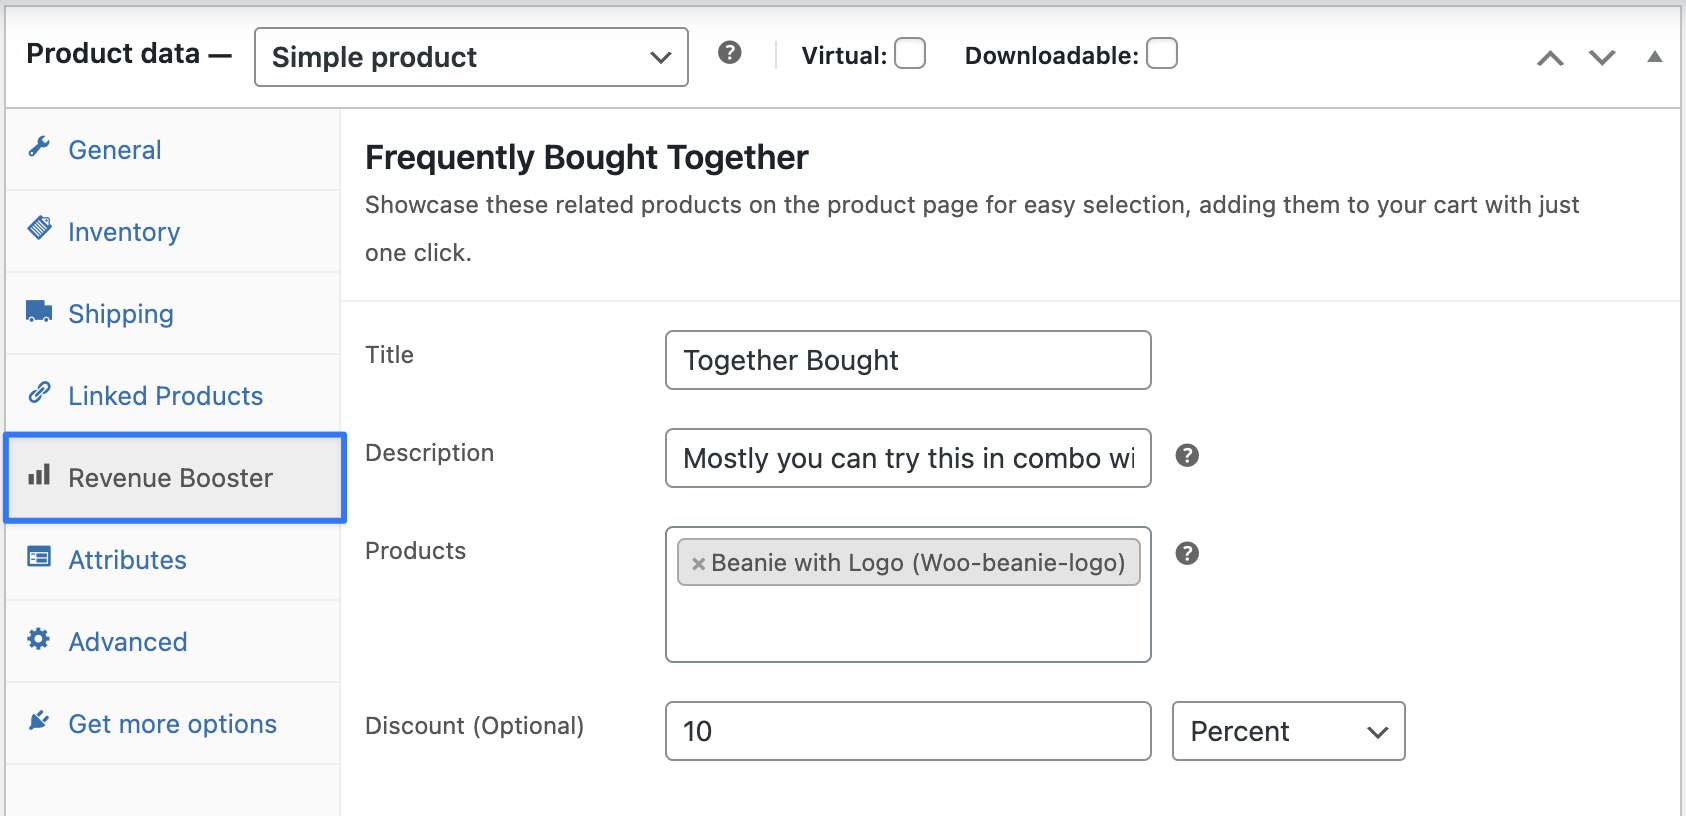
For Example: Once the user purchases the Beanie product then want to allow 10% OFF on another product Beanie With Logo product.
First, configure the Beanie product Revenue Booster settings on the product detail page.
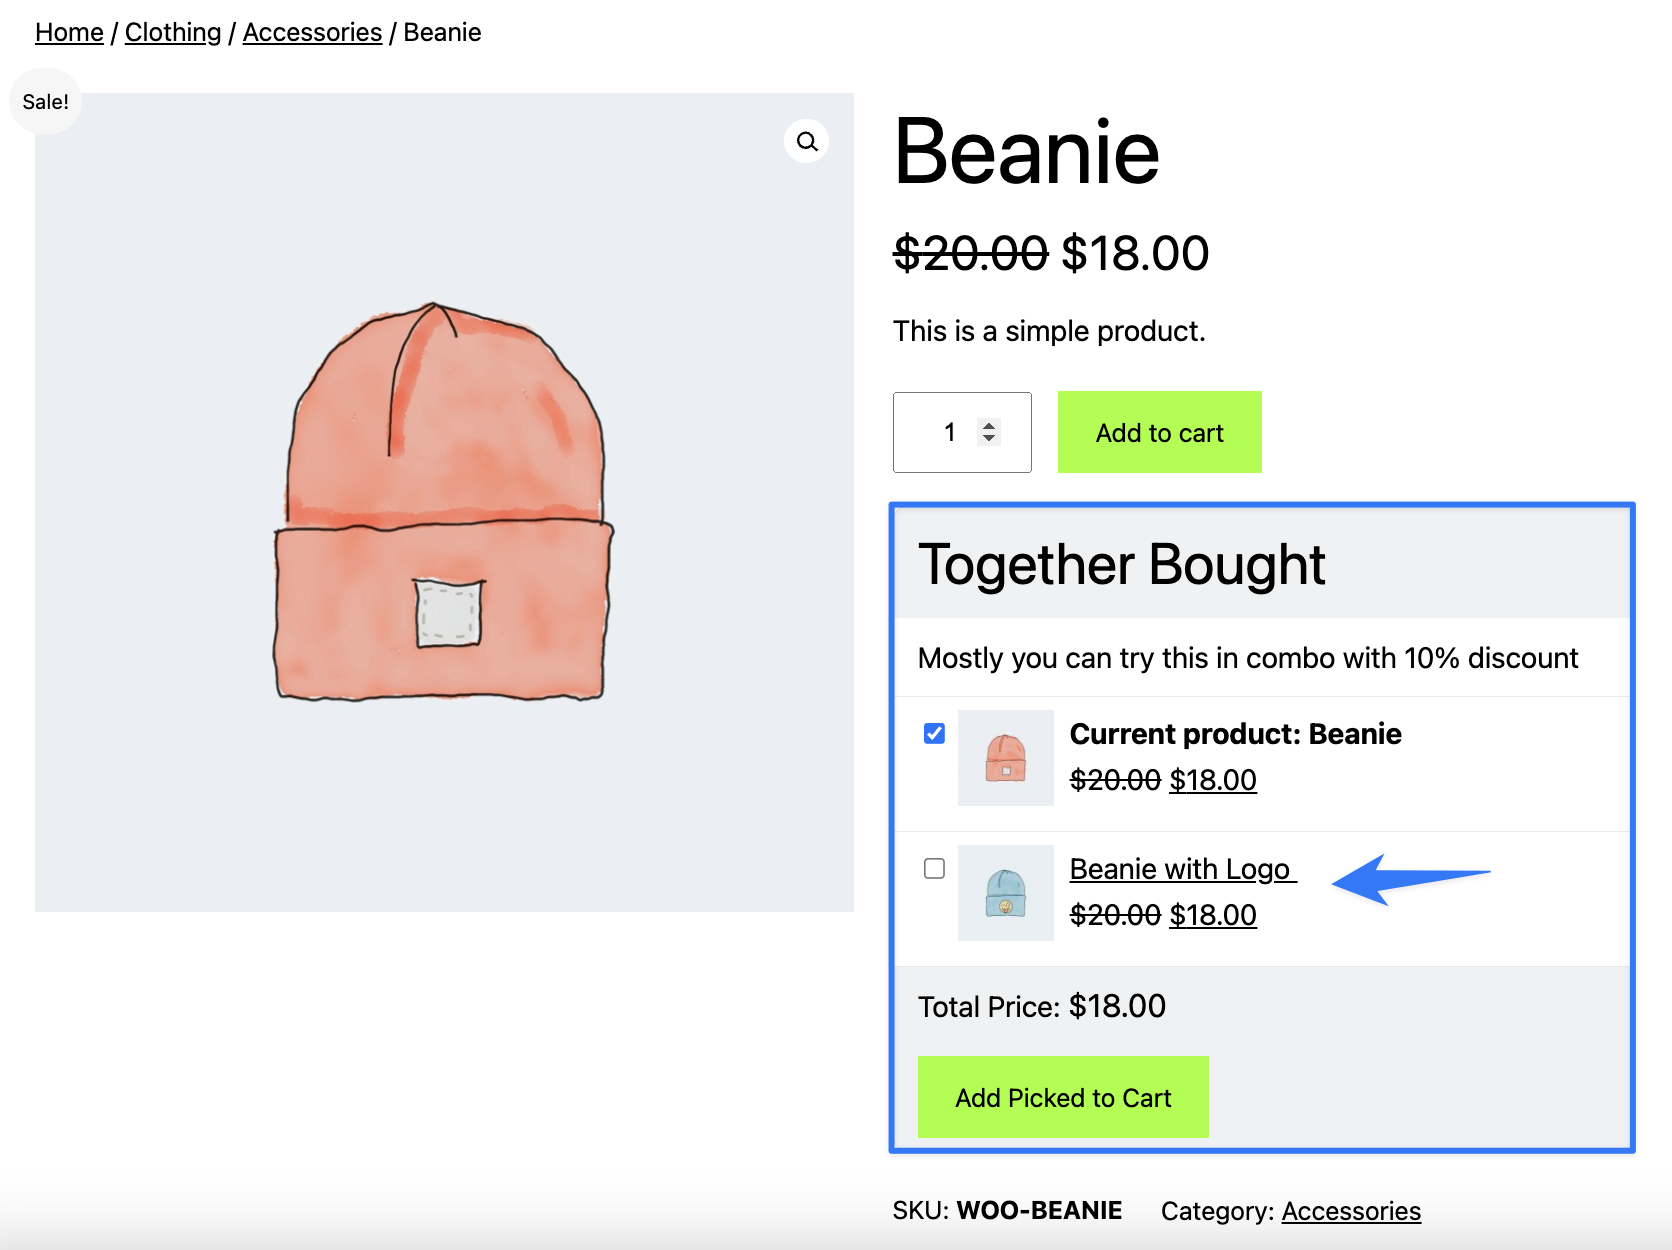
Then, once the user goes to the Beanie product page it will showcase the Frequently Bought Together section with recommendation products.
Step - 3 Setup the Order Bumps Offer at Checkout

In the order bumps, you have the option to select a product to showcase as an order bump on checkout and offer rules to enable it.
Why Use Order Bump?
Increases Your Average Order Size: When a customer accepts an Order Bump offer, they end up spending more than they originally planned.
Enhances Customer Experience: By showing targeted, customized offers based on what's already in the customer's cart, you improve their overall experience, boosting customer loyalty.
Attracts New Customers: Satisfied customers who benefit from Order Bumps are more likely to refer new users to your site.
Let's configure one order bump for Beanie and Beanie with logo product that avails Belt product at order bump at checkout.
First, select a product that you want to offer once the conditions are met. Then add the rules that you want to avail for specific products as you can see the settings in the below screenshot.

Once the above offer rules are true it will showcase the order bump product at the checkout page.

Step - 4 Add Custom Message for Order Bumps Section
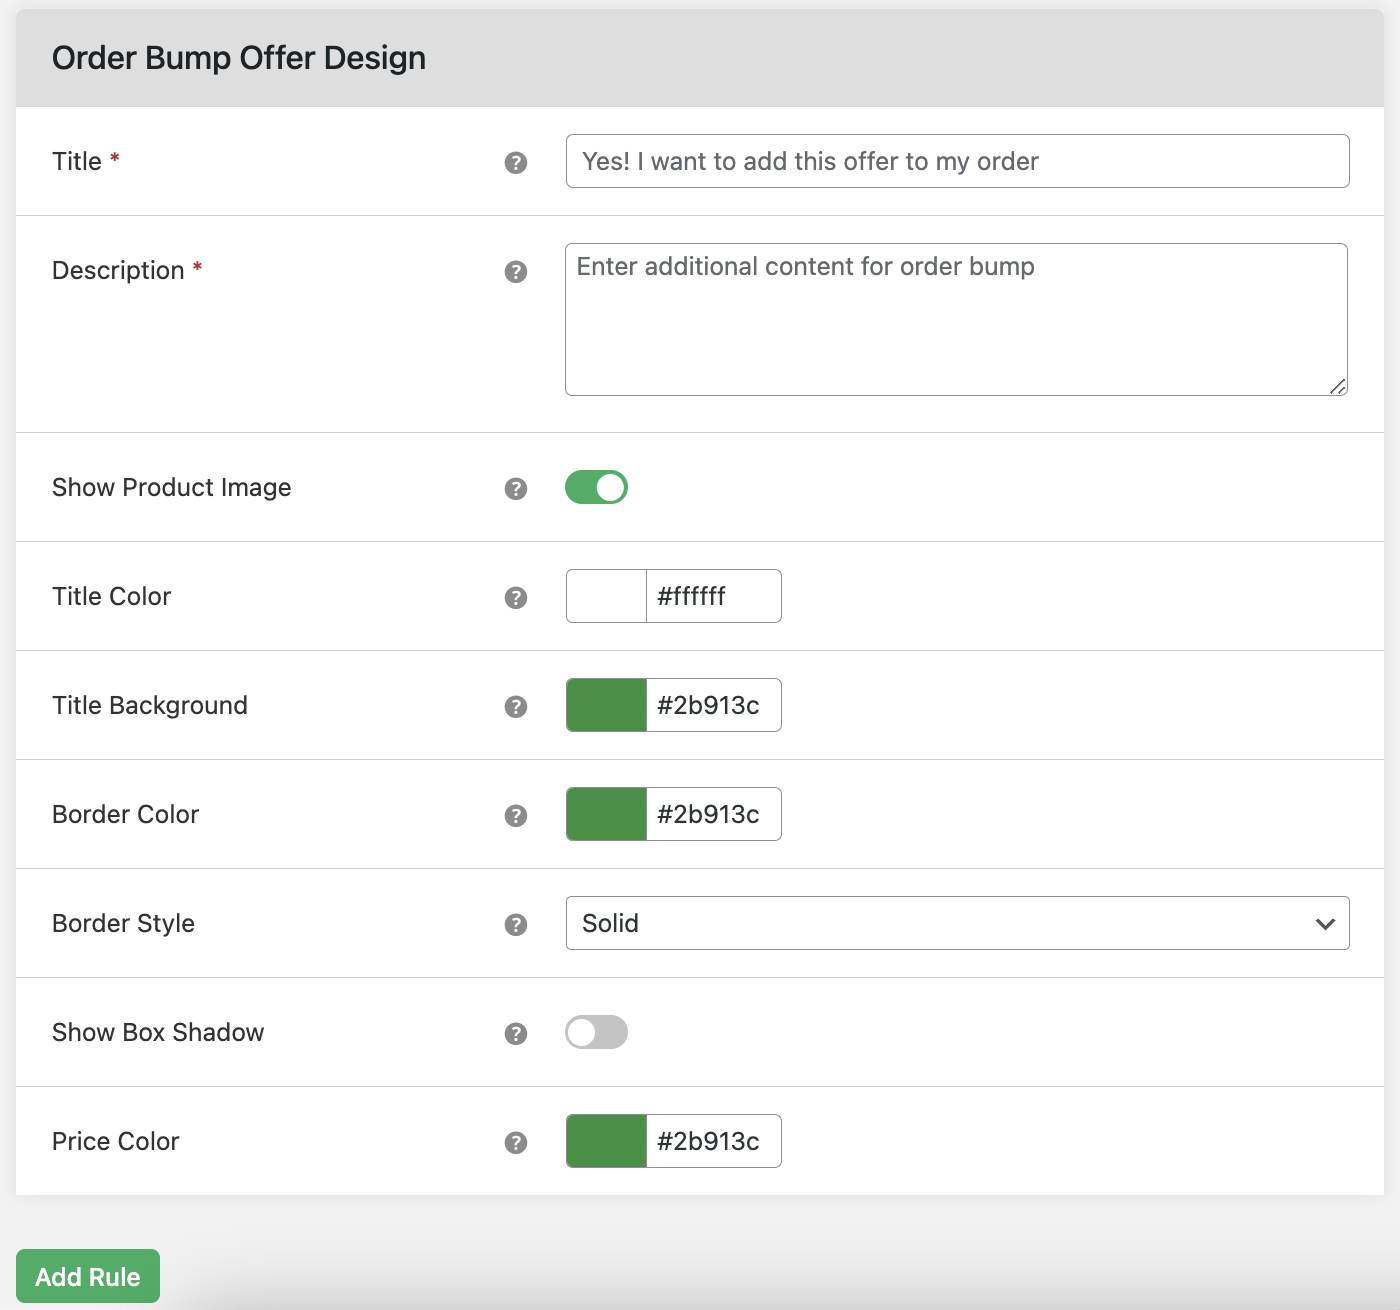
In this design section, you can configure the order bumps box stylings and custom user messages.
Let me configure this section with some custom messages and styles to check how it will look on the checkout page.

Based on the above styling it will look like the below design on the checkout page.

Step - 5 Configure the After Checkout Page Offer

In the After Checkout section, you are required to choose the product and offer rules to enable it for the post-order process, at the checkout page after the user clicks on the Place Order button.
In the below screenshot, the user has added the beanie product to the cart after trying to place an order but as per the offer rules the Beanie product matched and it will display the checkout order bump.

In this document, we have provided a quick overview of the plugin and basic settings that you can quickly choose to get started. Our plugin allows you to start earning with incredibly different order bump offers.
Ready to elevate your customer experience? Start using the Revenue Booster For WooCommerce plugin today!
If you're interested in learning about all of the other settings and features in Revenue Booster For WooCommerc then review the plugin documentation.