
Beginners Guide for Ecommerce Tracking Plugin
The Enhanced Ecommerce Google Analytics for WooCommerce plugin by Dotstore connects your WooCommerce store to Google Analytics 4 (GA4) and tracks the full customer journey, product views, add to cart, checkout, purchases, and refunds, without you writing any tracking code.
Beyond ecommerce events, it also lets you track content interactions (clicks, scroll depth, time on page), exclude specific user roles from tracking, and view your store's GA4 reports right inside WordPress.
In The Article
What You Can Do with This Plugin
- Connect GA4 in a few clicks with Connect with Google, or enter your Measurement ID manually
- Track core ecommerce events: product views, add to cart, checkout, purchases, and refunds
- Send purchase and refund events server-side with Measurement Protocol backend tracking, so ad blockers can't stop them
- Track clicks on Gutenberg blocks (Button, File, Social Link, Image, Read More, Search) with Block Conversion Tracking
- Build your own Custom Events for clicks, scroll depth, time on page, or custom JavaScript
- Exclude specific user roles (e.g., admins, editors) from being tracked
- View sessions, page views, top pages, and more in the built-in Admin Dashboard, without leaving WordPress
How to Get Started
Step 1: Install and Activate the Plugin
You can install the plugin like any other WooCommerce plugin. For a detailed guide, see how to install and activate a Dotstore plugin.
Step 2: Go to the Plugin Settings
After activation, navigate to:
Admin → Dotstore Plugins → Ecommerce Tracking
This is where you'll connect GA4 and configure every tracking option covered in this guide.
Connecting Your GA4 Account
Step 1: Choose a connection method
The first time you open Ecommerce Tracking, you'll see a welcome screen with two ways to connect:
- Connect with Google (recommended) — signs in with your Google account and automatically fetches your GA4 properties
- Enter GA4 Measurement ID — for when you already know your Measurement ID (format
G-XXXXXXXXXX)

Step 2: Complete the connection
If you chose Connect with Google, sign in and select your GA4 property from the list, then confirm the connection. If you entered your Measurement ID manually, click Submit & Save.
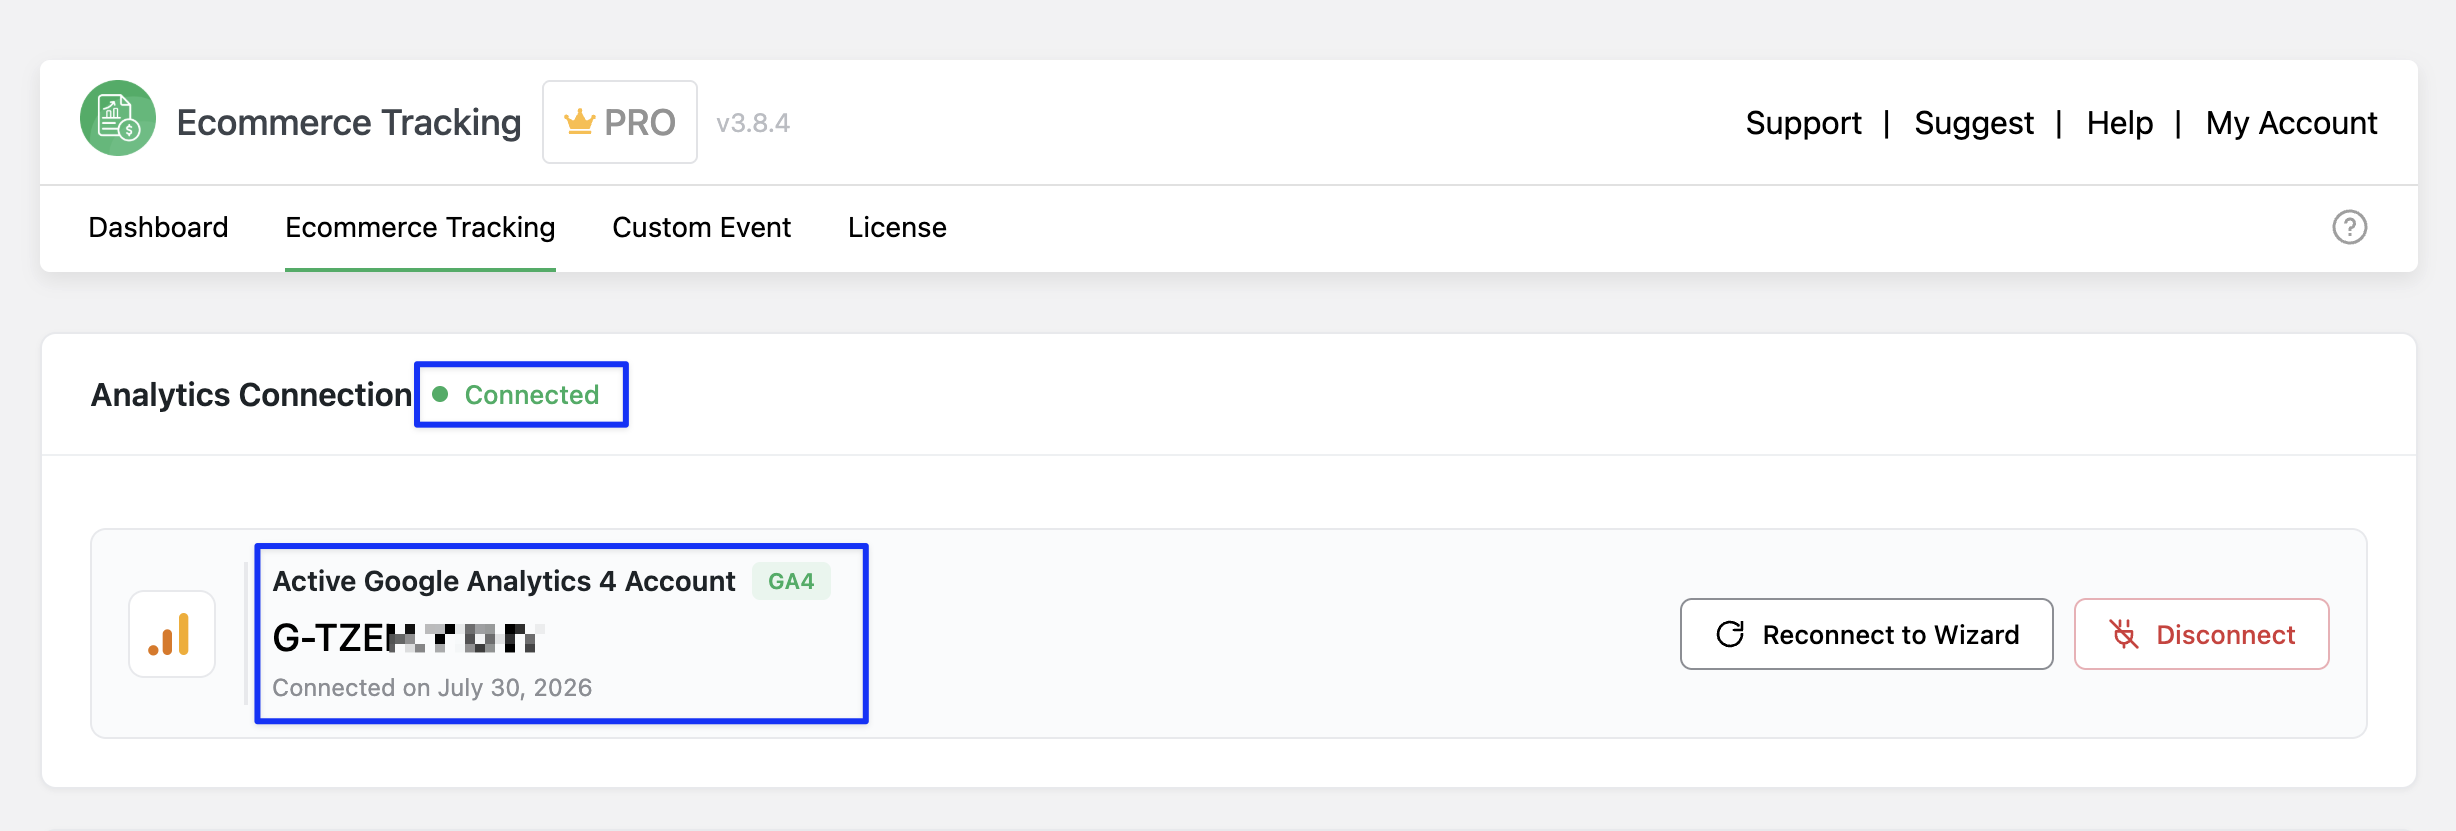
Once connected, the Analytics Connection panel shows your active GA4 account and the date it was connected. You can reconnect or disconnect from here anytime.
Step 3: Turn on tracking
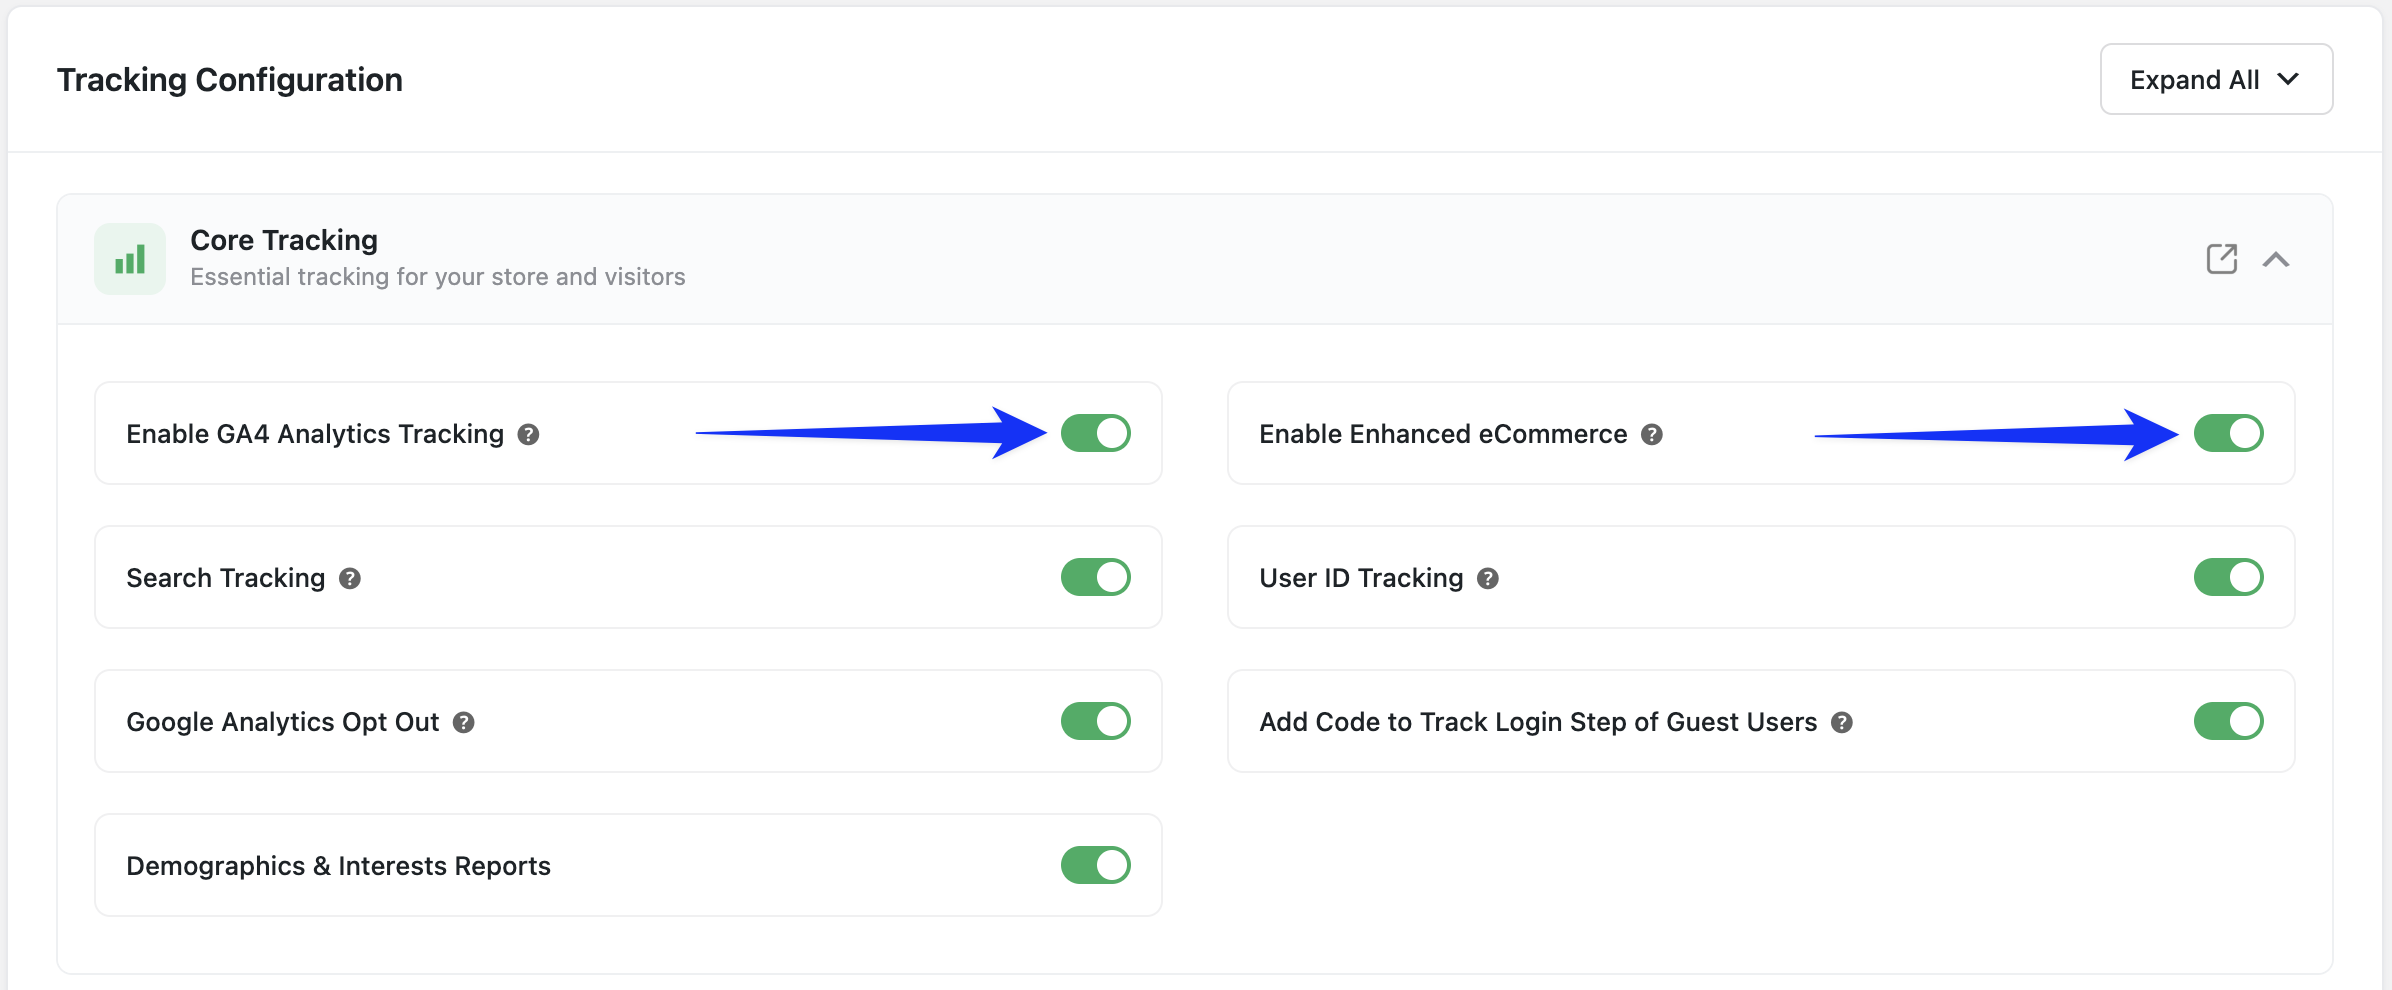
Below the connection panel, open Core Tracking and turn on Enable GA4 Analytics Tracking and Enable Enhanced eCommerce. This is what actually starts sending ecommerce events to GA4.
Finding Your Way Around
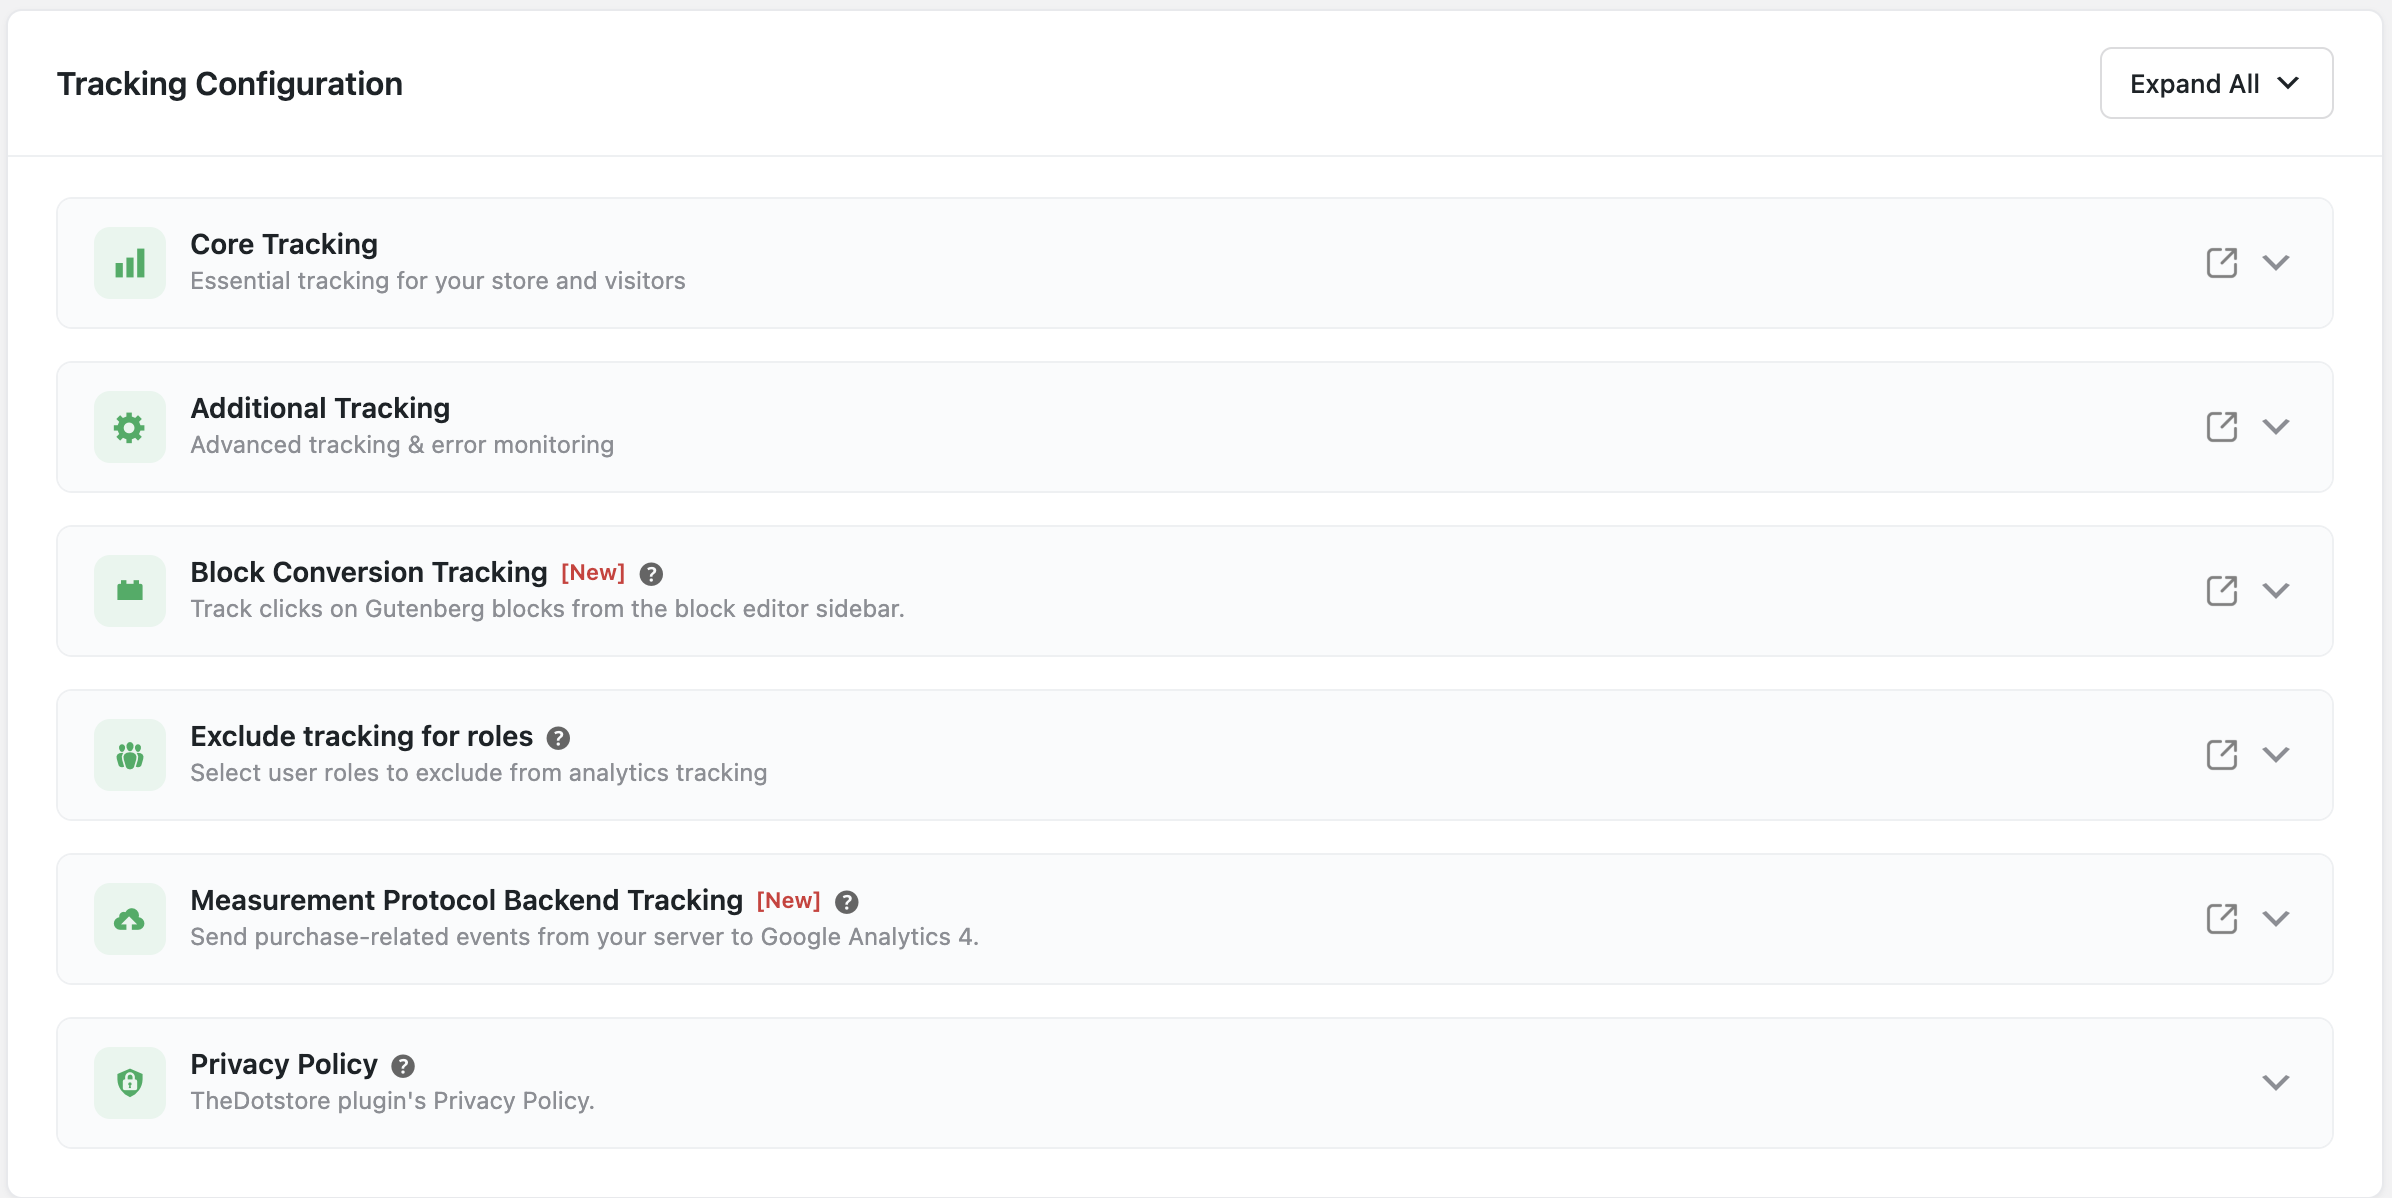
The Ecommerce Tracking settings page is organized into a few key sections:
| Section | What it covers |
|---|---|
| Core Tracking | GA4 tracking, Enhanced eCommerce, search tracking, user ID tracking |
| Additional Tracking | 404 errors, file downloads, forms, comments, product reviews, sign-in/out/up, custom events |
| Block Conversion Tracking | Click tracking on Gutenberg blocks like Button, File, and Image |
| Exclude Tracking for Roles | Choose which user roles (e.g., Administrator) are excluded from tracking |
| Measurement Protocol Backend Tracking | Send purchase and refund events from your server instead of the browser |
Each section in the plugin has its own documentation link (the small icon next to the section title) if you want to go deeper on any one feature.
Pro Tips
- Use Connect with Google over the manual Measurement ID if you have sign-in access, it's fewer steps and less room for typos
- If you're the store admin, add your own role under Exclude Tracking for Roles so your testing doesn't skew your analytics
- Turn on Enable Debug Mode under Measurement Protocol while testing, it logs to WooCommerce → Status → Logs so you can confirm events are actually being sent
- Check GA4 → Reports → Realtime right after setup to confirm data is flowing before you move on to other settings
Common Use Cases
- Track purchases and refunds reliably, even when customers use ad blockers, using Measurement Protocol backend tracking
- Measure CTA and download clicks on your pages using Block Conversion Tracking, no extra plugin needed
- Keep your own staff activity out of your analytics by excluding admin and shop-manager roles
- Build a custom event to track something specific to your store, like scroll depth on a landing page or time spent on a pricing page
- Check store performance at a glance using the Admin Dashboard, without switching to Google Analytics