How to customize the size chart table pop-up in WooCommerce
Let's you add branded size guides to product pages and control how they appear. Use a pop-up for fast access on mobile, choose a table style that fits your content, and set the pop-up position so it doesn’t block key product details.

In The Article
How to customize a pop-up
Customizable Size Chart Pop-up — Decide:
- Chart Position: Pop-up
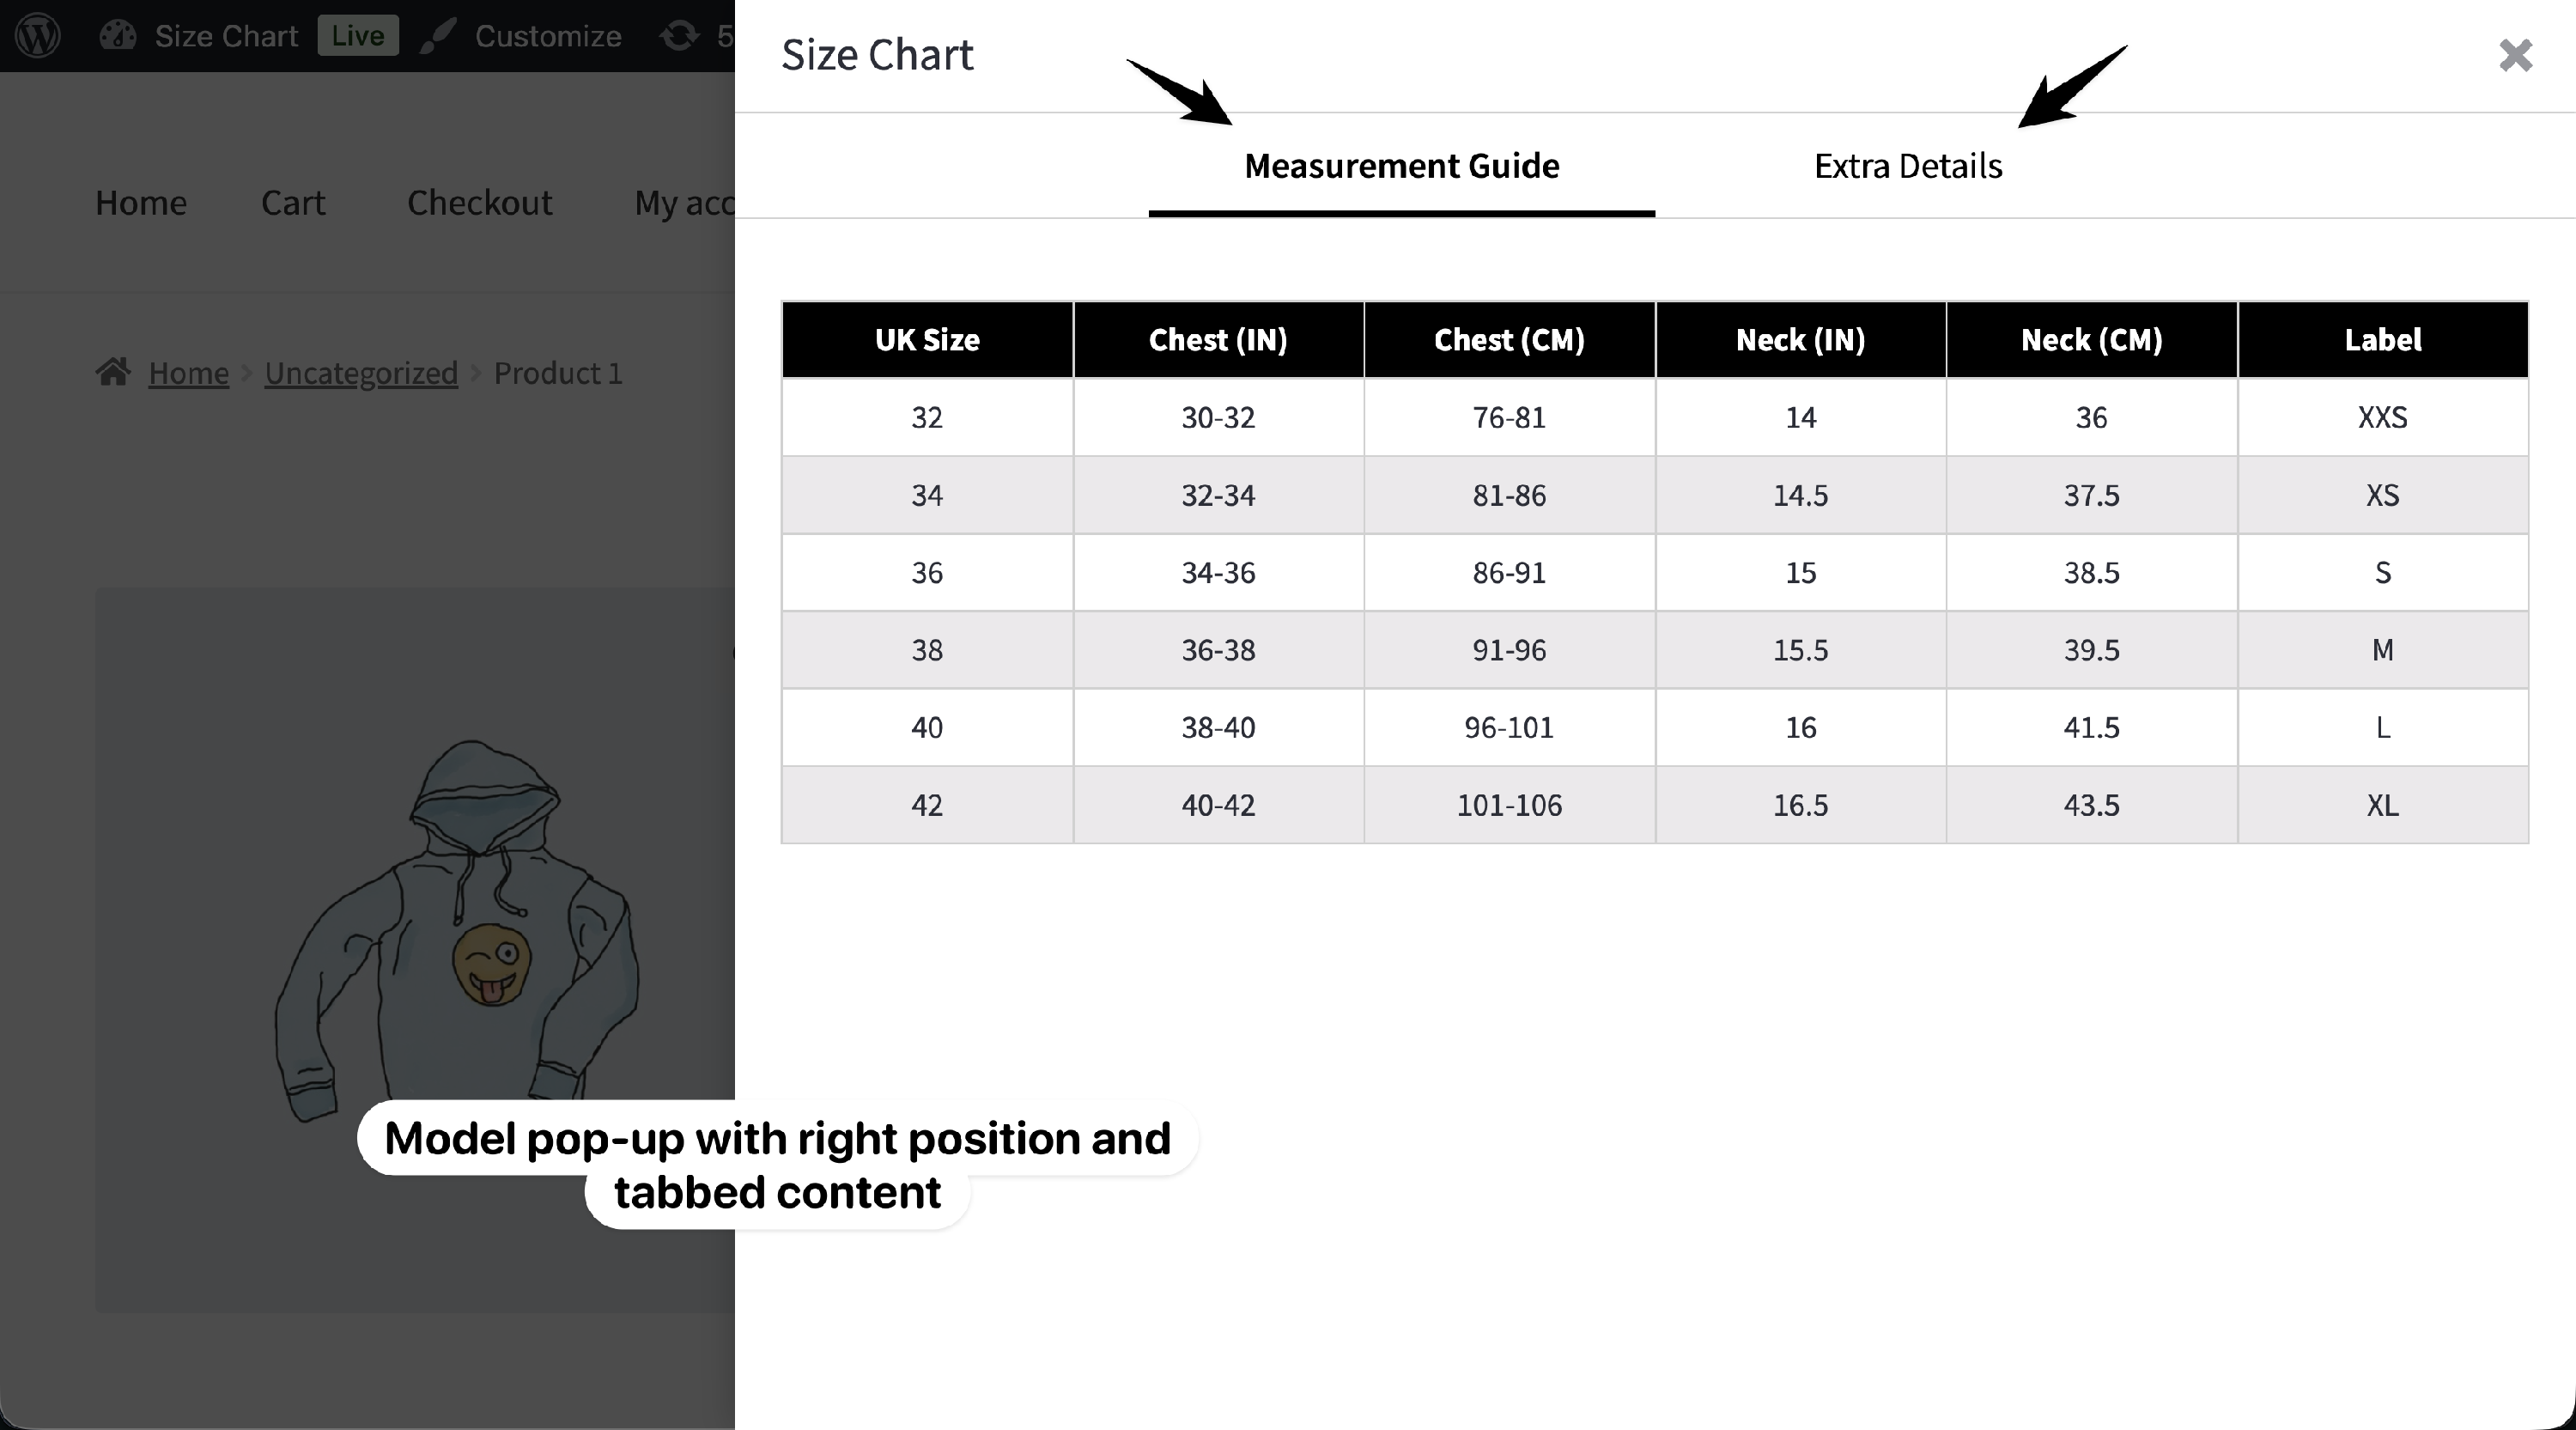
- Chart Style: Standard (single table/content) or Tabbed Chart (multiple tabs like “Size Table”, “How to Measure”, “Fit Tips”)
- Pop-up Position: Right, Left, or Center
Benefits of a custom pop-up
- Keeps PDPs clean while giving quick access to measurements
- Improves mobile UX (tap → pop-up)
- Let's you organize complex info in tabs
- Avoids covering images/price by choosing the best pop-up position
How to configure — step guide
Access the plugin
Goto: Dashboard → Dotstore → Product size chart → Size chart
Create or edit a chart
-
Go to Dotstore → Product size chart → Size chart and click Add new (or Edit an existing chart).
Add a Chart Title and build your Chart Table (use the one-click generator or add rows/columns).
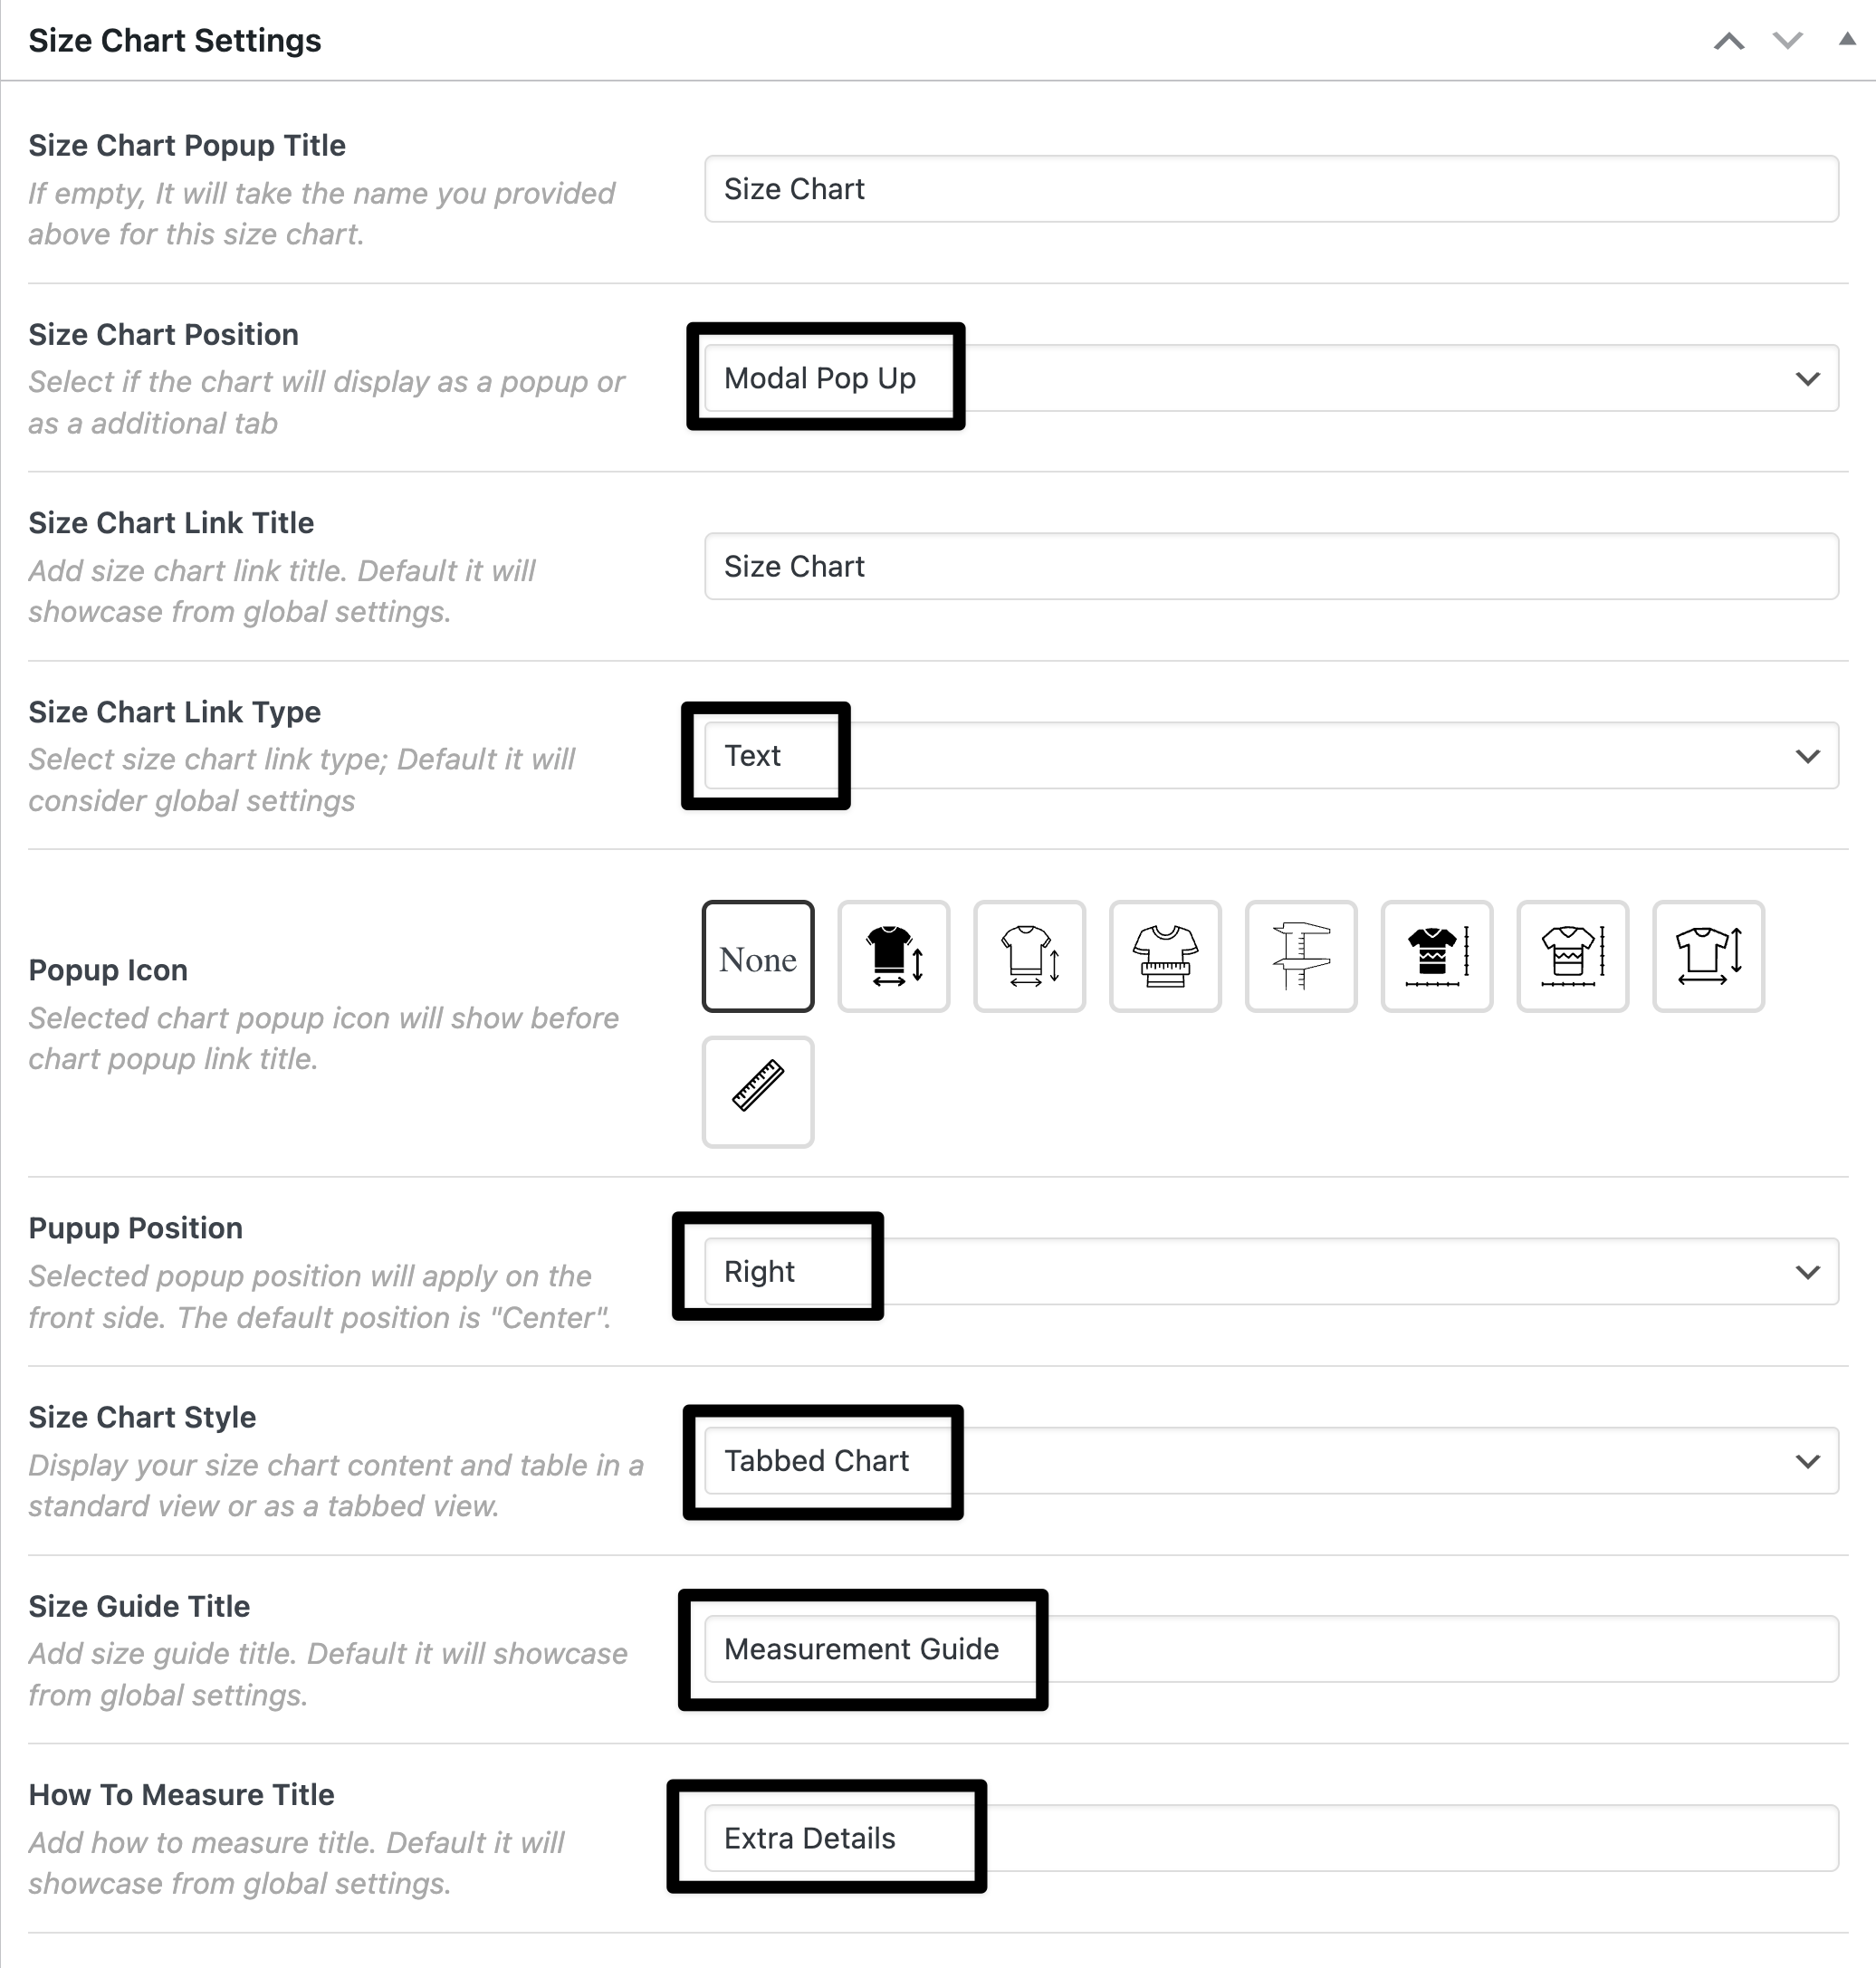
Open Size Chart Settings and set:
- Chart Position: Pop-up
- Chart Style: choose Standard or Tabbed Chart
- Pop-up Position: Right, Left, or Center
- If Tabbed Chart, create tabs (e.g., Size Table, How to Measure, Fit Tips).
- Set Button text (e.g., SIZE GUIDE) and (optional) tooltip/notes.
- In the right-side Product selection widget, pick the products that should use this chart.
-
Click Publish (or Update).

Verify on the storefront
8) Open an assigned product → click SIZE GUIDE → confirm the pop-up opens with the chosen style and appears on the selected position (Right/Left/Center) on desktop and mobile.
Ready to See All Features in Actions?
Access our complete advanced features instance, allowing you to configure every feature with real checkout scenarios.
Real examples
Example 1 — US Men’s T-Shirt (inches)
- Chart Style: Standard
- Pop-up Position: Right (keeps gallery visible)
- Columns: Size, Chest (in), Length (in)
- Assigned to: Sparta Gym Tee, Classic Crew Tee
Example 2 — US Women’s Sneakers (US/EU + in/cm)
- Chart Style: Tabbed Chart with tabs: US (in), EU (cm), How to Measure
- Pop-up Position: Center (balanced focus)
- Assigned to: Aero Run Sneaker, StreetFlex Knit
Expected outcome
- Shoppers open a clean pop-up size guide that’s styled (Standard or Tabbed) and positioned where it’s easiest to read.
- Faster decisions → fewer questions, fewer wrong-size returns, and more completed orders.
FAQs
1) Standard vs Tabbed — which should I use?
Use Standard for short tables. Use Tabbed for extra content (US/EU, in/cm, fit tips) so each tab stays readable.
2) Which pop-up position is best?
- Right/Left: avoids covering the image/price on wide screens.
- Center: strongest focus; ideal for short decisions. Test with your theme.
3) Can I show multiple pop-ups on one product?
Yes. Create multiple charts (e.g., Top and Bottom), set each to Pop-up, and assign both. Use clear button labels.
4) Does this work with Elementor/Divi/Blocks?
Yes. The pop-up and styles work across major page builders and themes.
5) Can I localize units (in/cm) or regions (US/EU/UK)?
Yes. Add columns or use Tabbed style to separate units/regions.